HOW TO USE THE TESTNET on WINDOWS
Remember: Coins produced have Zero Value
(1) Go over and get a testnet address
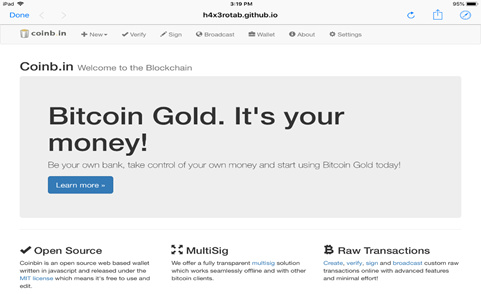
The first thing you want to do is go to Bitcoin Gold Wallet by Coinb.in
Next, you click on settings on the upper far right. This step is important!

Under network (first line) there is a drop menu similar to the picture. Click Bitcoin Gold (mainnet) and make it Bitcoin Gold (testnet).
The next two lines under Broadcast and Unspent outputs should say:
test-explorer.bitcoingold.org (Bitcoin Gold)
At the bottom left click submit….
NOTE: above submit it should say Settings updates successfully
After you click submit, there’s a tab labeled Wallet
NOTE: Time to grab a pen and paper.
Click on Wallet.
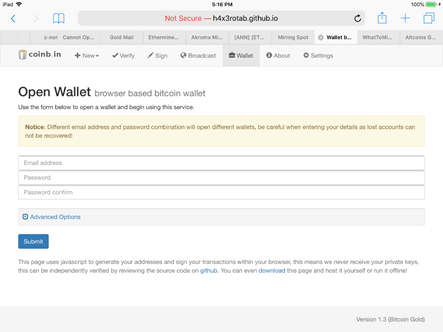
This is where you need to create your wallet.
Put in an email address and password (password must be at least 10 digits long)
Confirm password
PLEASE WRITE IT DOWN AND SAVE YOUR PRIVATE KEYS
- Leave advanced options alone -
Press submit.
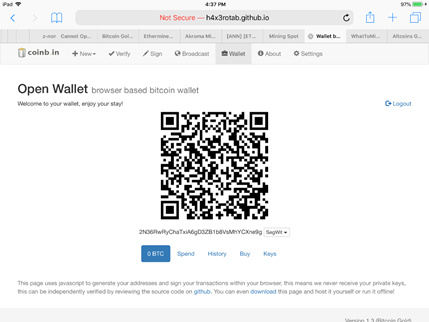
Here’s your new public wallet address - this is the address you’ll use to configure your miner.
Before you go, maybe copy and paste or print your wallet address or type it out and save on notepad.
If you need to recreate it, you can go back to Wallet and submit the same email and password again; it will generate this exact same wallet.
THIS IS ONLY A TEST WALLET COINS HAVE NO VALUE !!
(If you’re interested in being able to experiment with your mined testnet coins later, you should click on Keys and and copy the private key. If all you want is a testnet address so you can test mining, don’t bother.)
There, the wallet is all set up and you are ready to get your miner ready.
(2) You will need a pool
Let’s head on over to either of:
http://btg-testnet.miningspot.net/
https://test-pool.bitcoingold.org/
(please bookmark one of these pages.)
(3) Get a miner program, option A: EWBF
We’ll walk through this twice, with two different miner programs.
(3.1) Get EWBF Cuda Miner
https://bitcointalk.org/index.php?topic=4466962.0
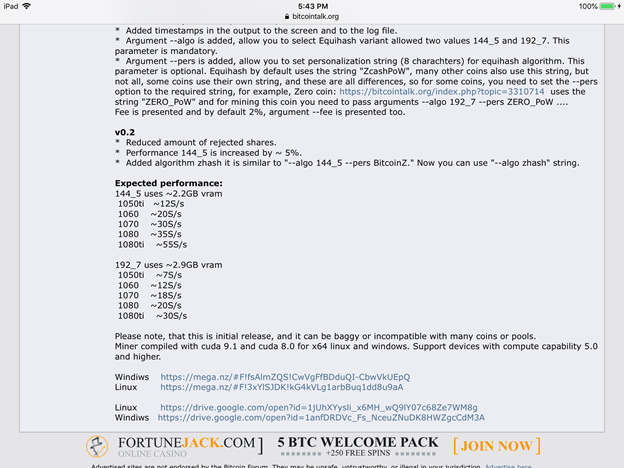
This is what the page looks like. Scroll down until you see top one
Windows MEGA
Download this file
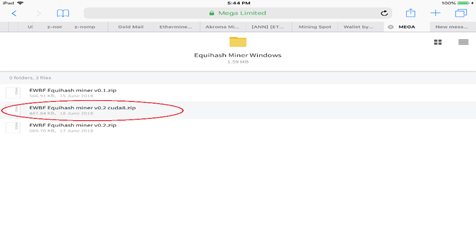
Unzip the file to a folder of your choice

For Mining Spot’s test pool:
http://btg-testnet.miningspot.net/
For Bitcoin Gold’s test pool:
https://test-pool.bitcoingold.org/
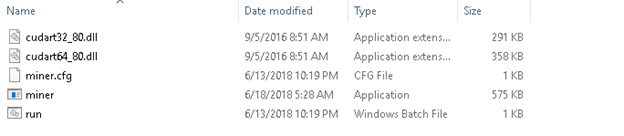
(3.2) Right click on run and select edit from the menu

Edit this file to look exactly like this. The only thing you need to change differently than the picture, is your wallet address located behind –user (you don’t need to put .test)
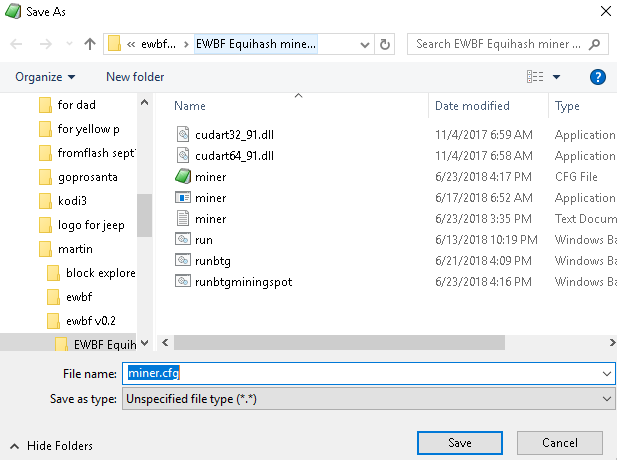
When you are done, we need to save it.
File
Save as

Name it whatever you like but at the end put .bat
Change Save as type All Files
There is another file you need to change as well.
(You might need to download and install a config editor such as EditPad Lite.)
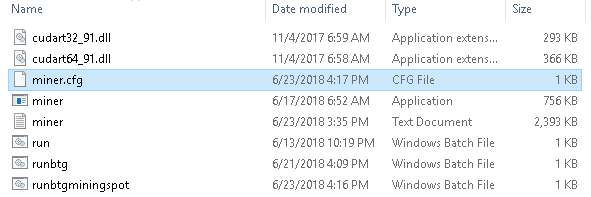
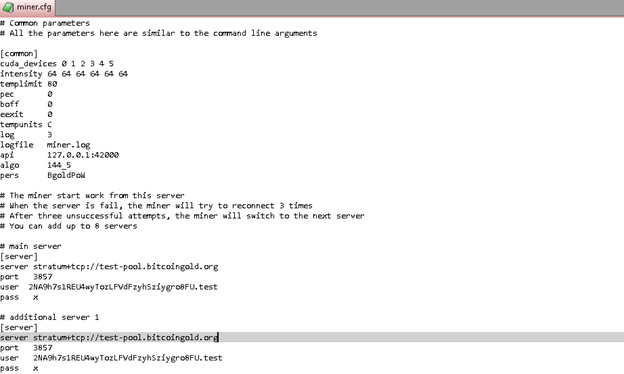
(3.3) Go to miner.cfg right click then Open With, choose an editing program.
When open it will look like this.
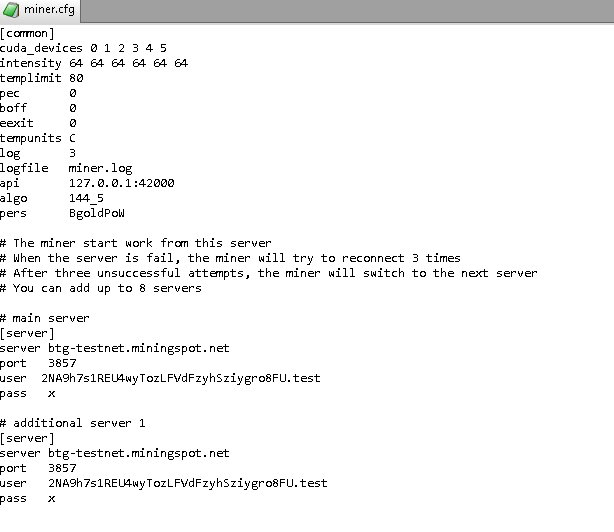
Where it says user this is where you put your wallet address
There are only 2 places you need to change that info.
When you are done go to file and save as
Notice the File name it says, miner
You need to make it the same as above miner.cfg
And press save
Your miner is ready. When you want to start mining, click the .Bat file that you just modified, It will start mining…
Virtual memory - don’t forget to adjust your VM to at least 25000 MB in Windows!
Here are the same steps as above, but showing how to set up for Bitcoin Gold’s test pool, https://test-pool.bitcoingold.org/
![]()
Same instructions as above to save.
Same instructions as above to save.
(4) Get a miner program, option B: FUNAKOSHI
I wish to welcome a new miner program FUNAKOSHI CUDA MINER for Nvidia
FIRST, create a folder on your desktop Funminer ( or whatever you please)
Then please head on over to:
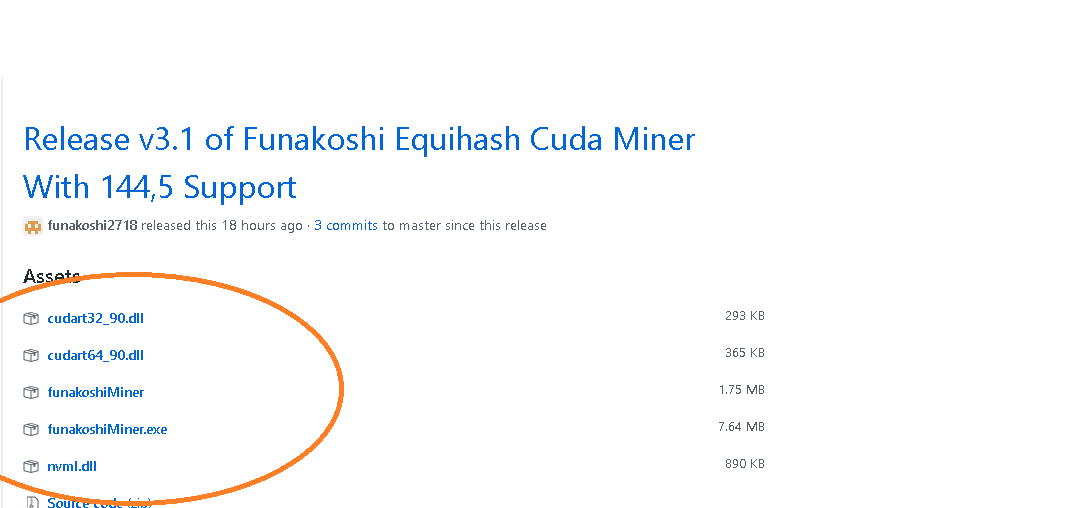
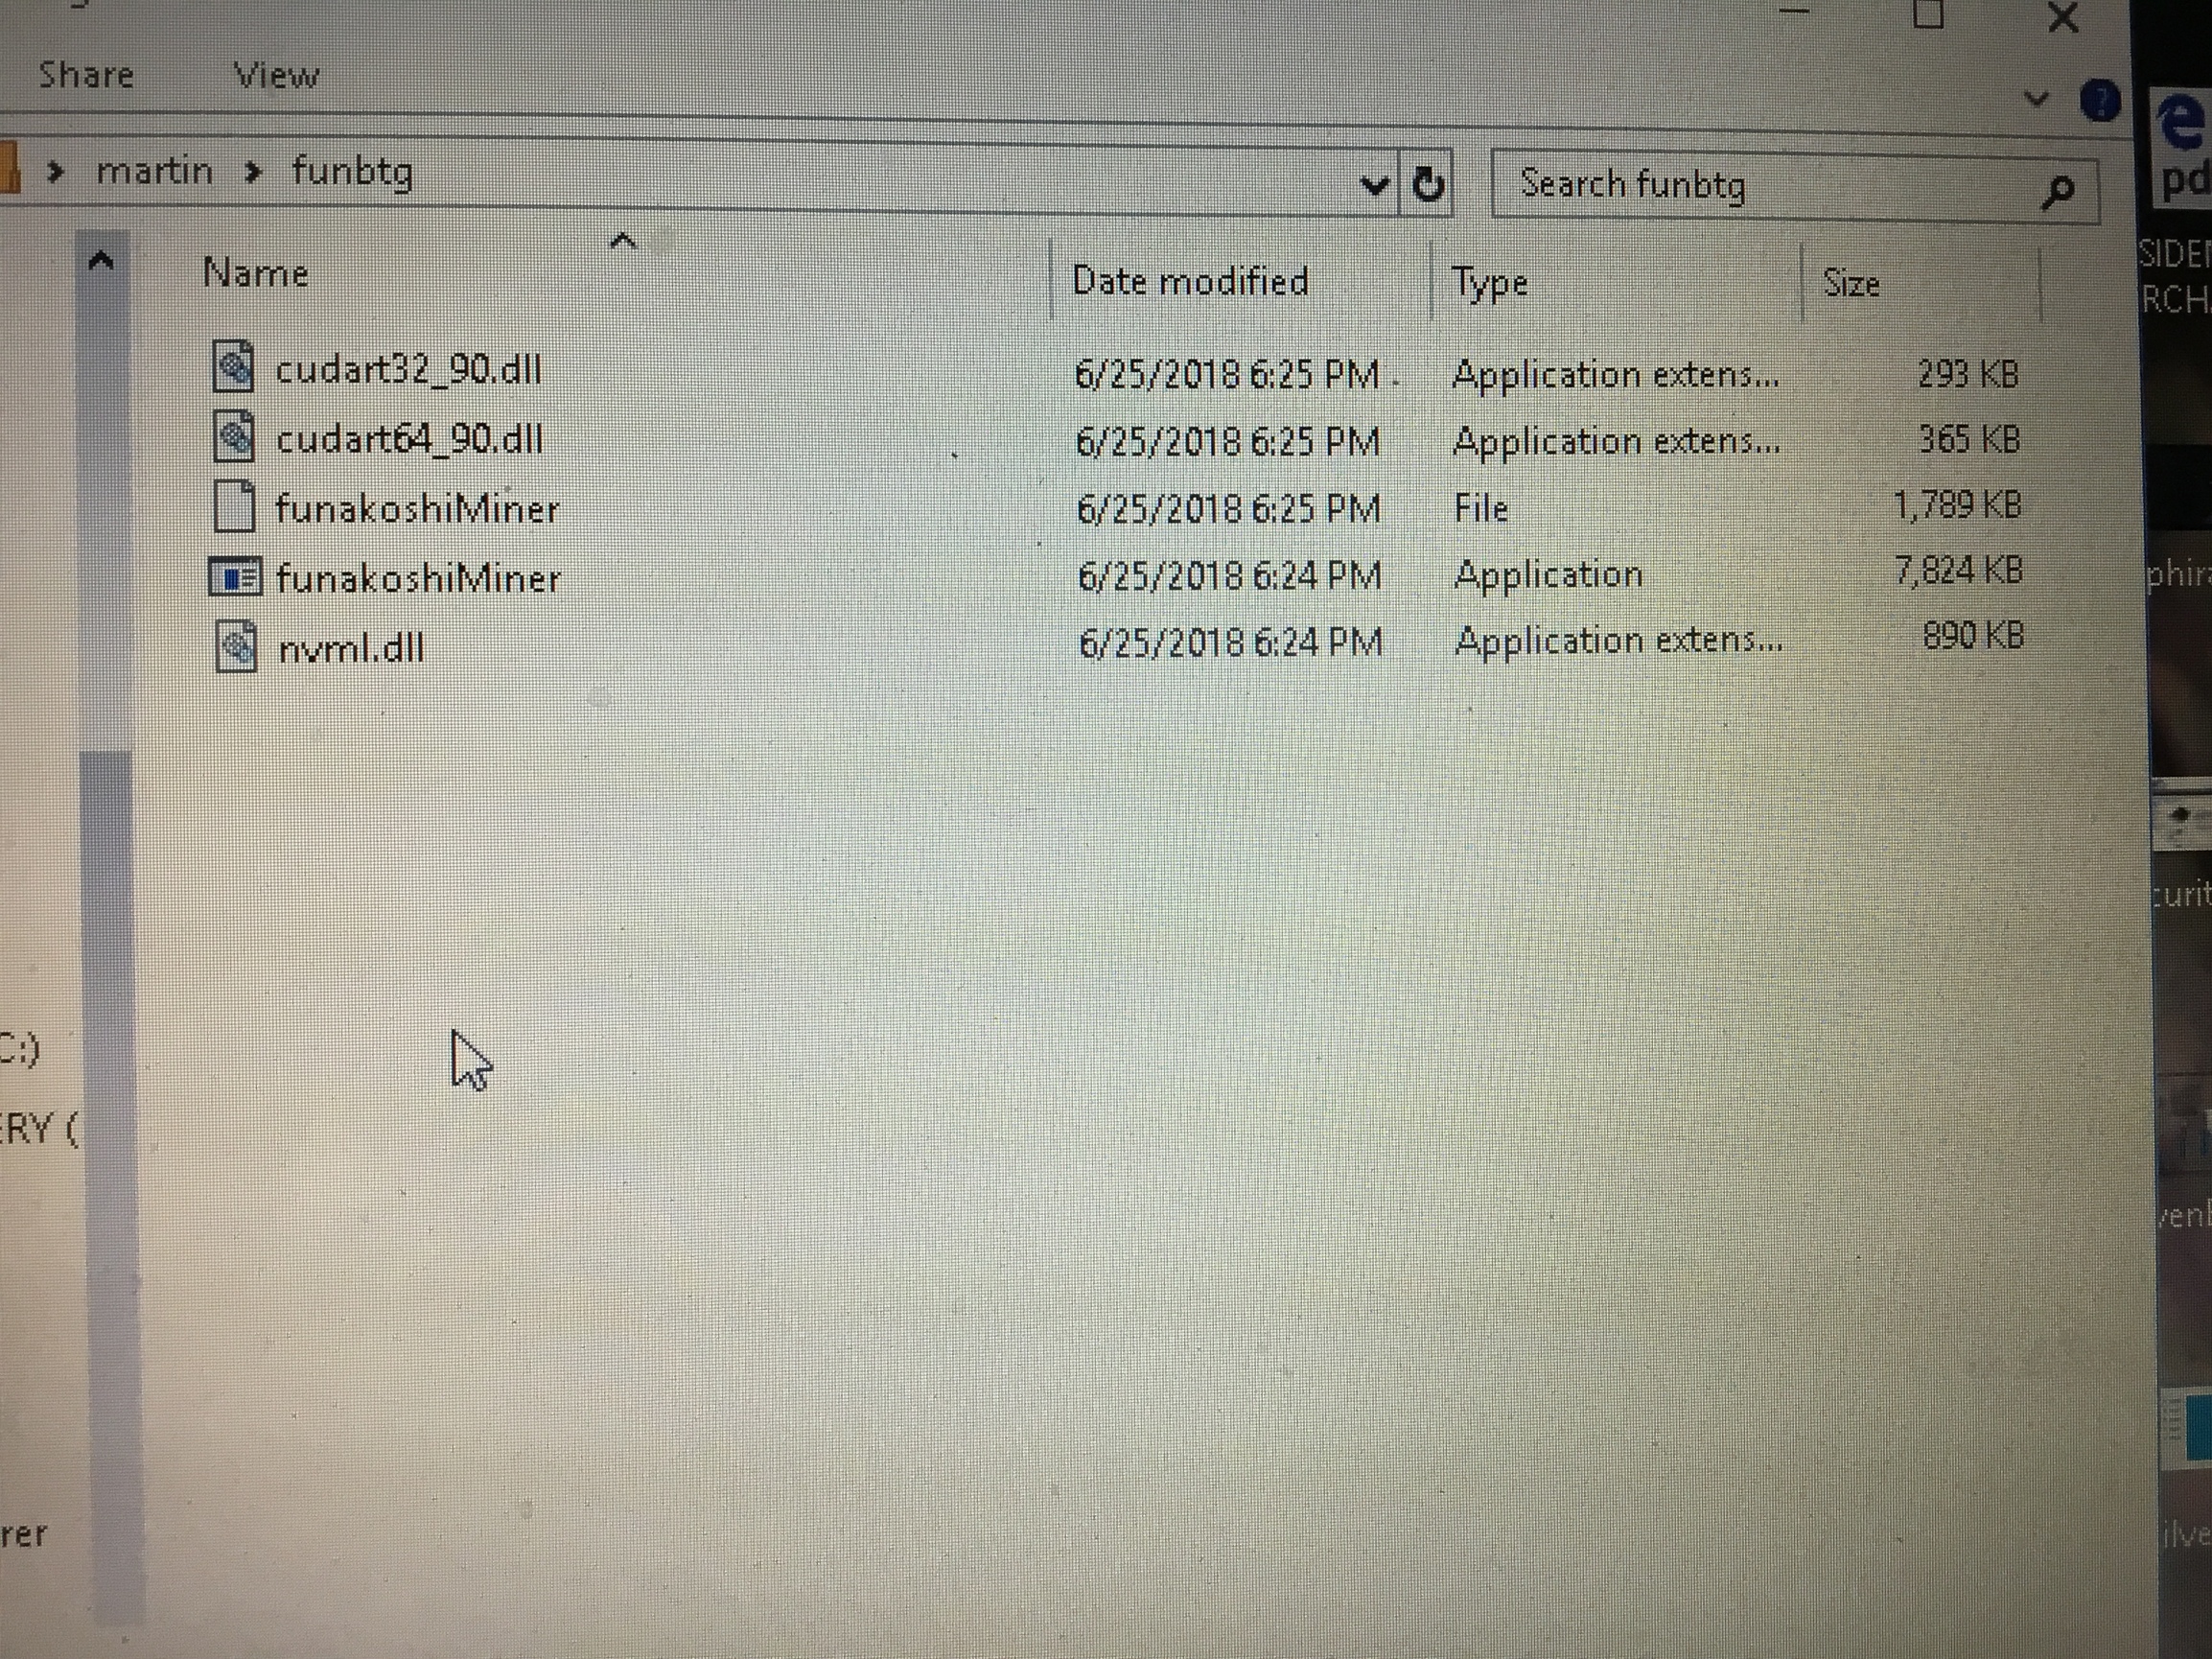
(4.1)These 5 files you HAVE to download and save to the folder you created. They may be in your download folder, so just copy and paste them.
This is what it will look like…
(4.2) UNLIKE OTHER MINER PROGRAMS, YOU MUST CREATE A .BAT FILE
Go to notepad and type in the information as you see below.
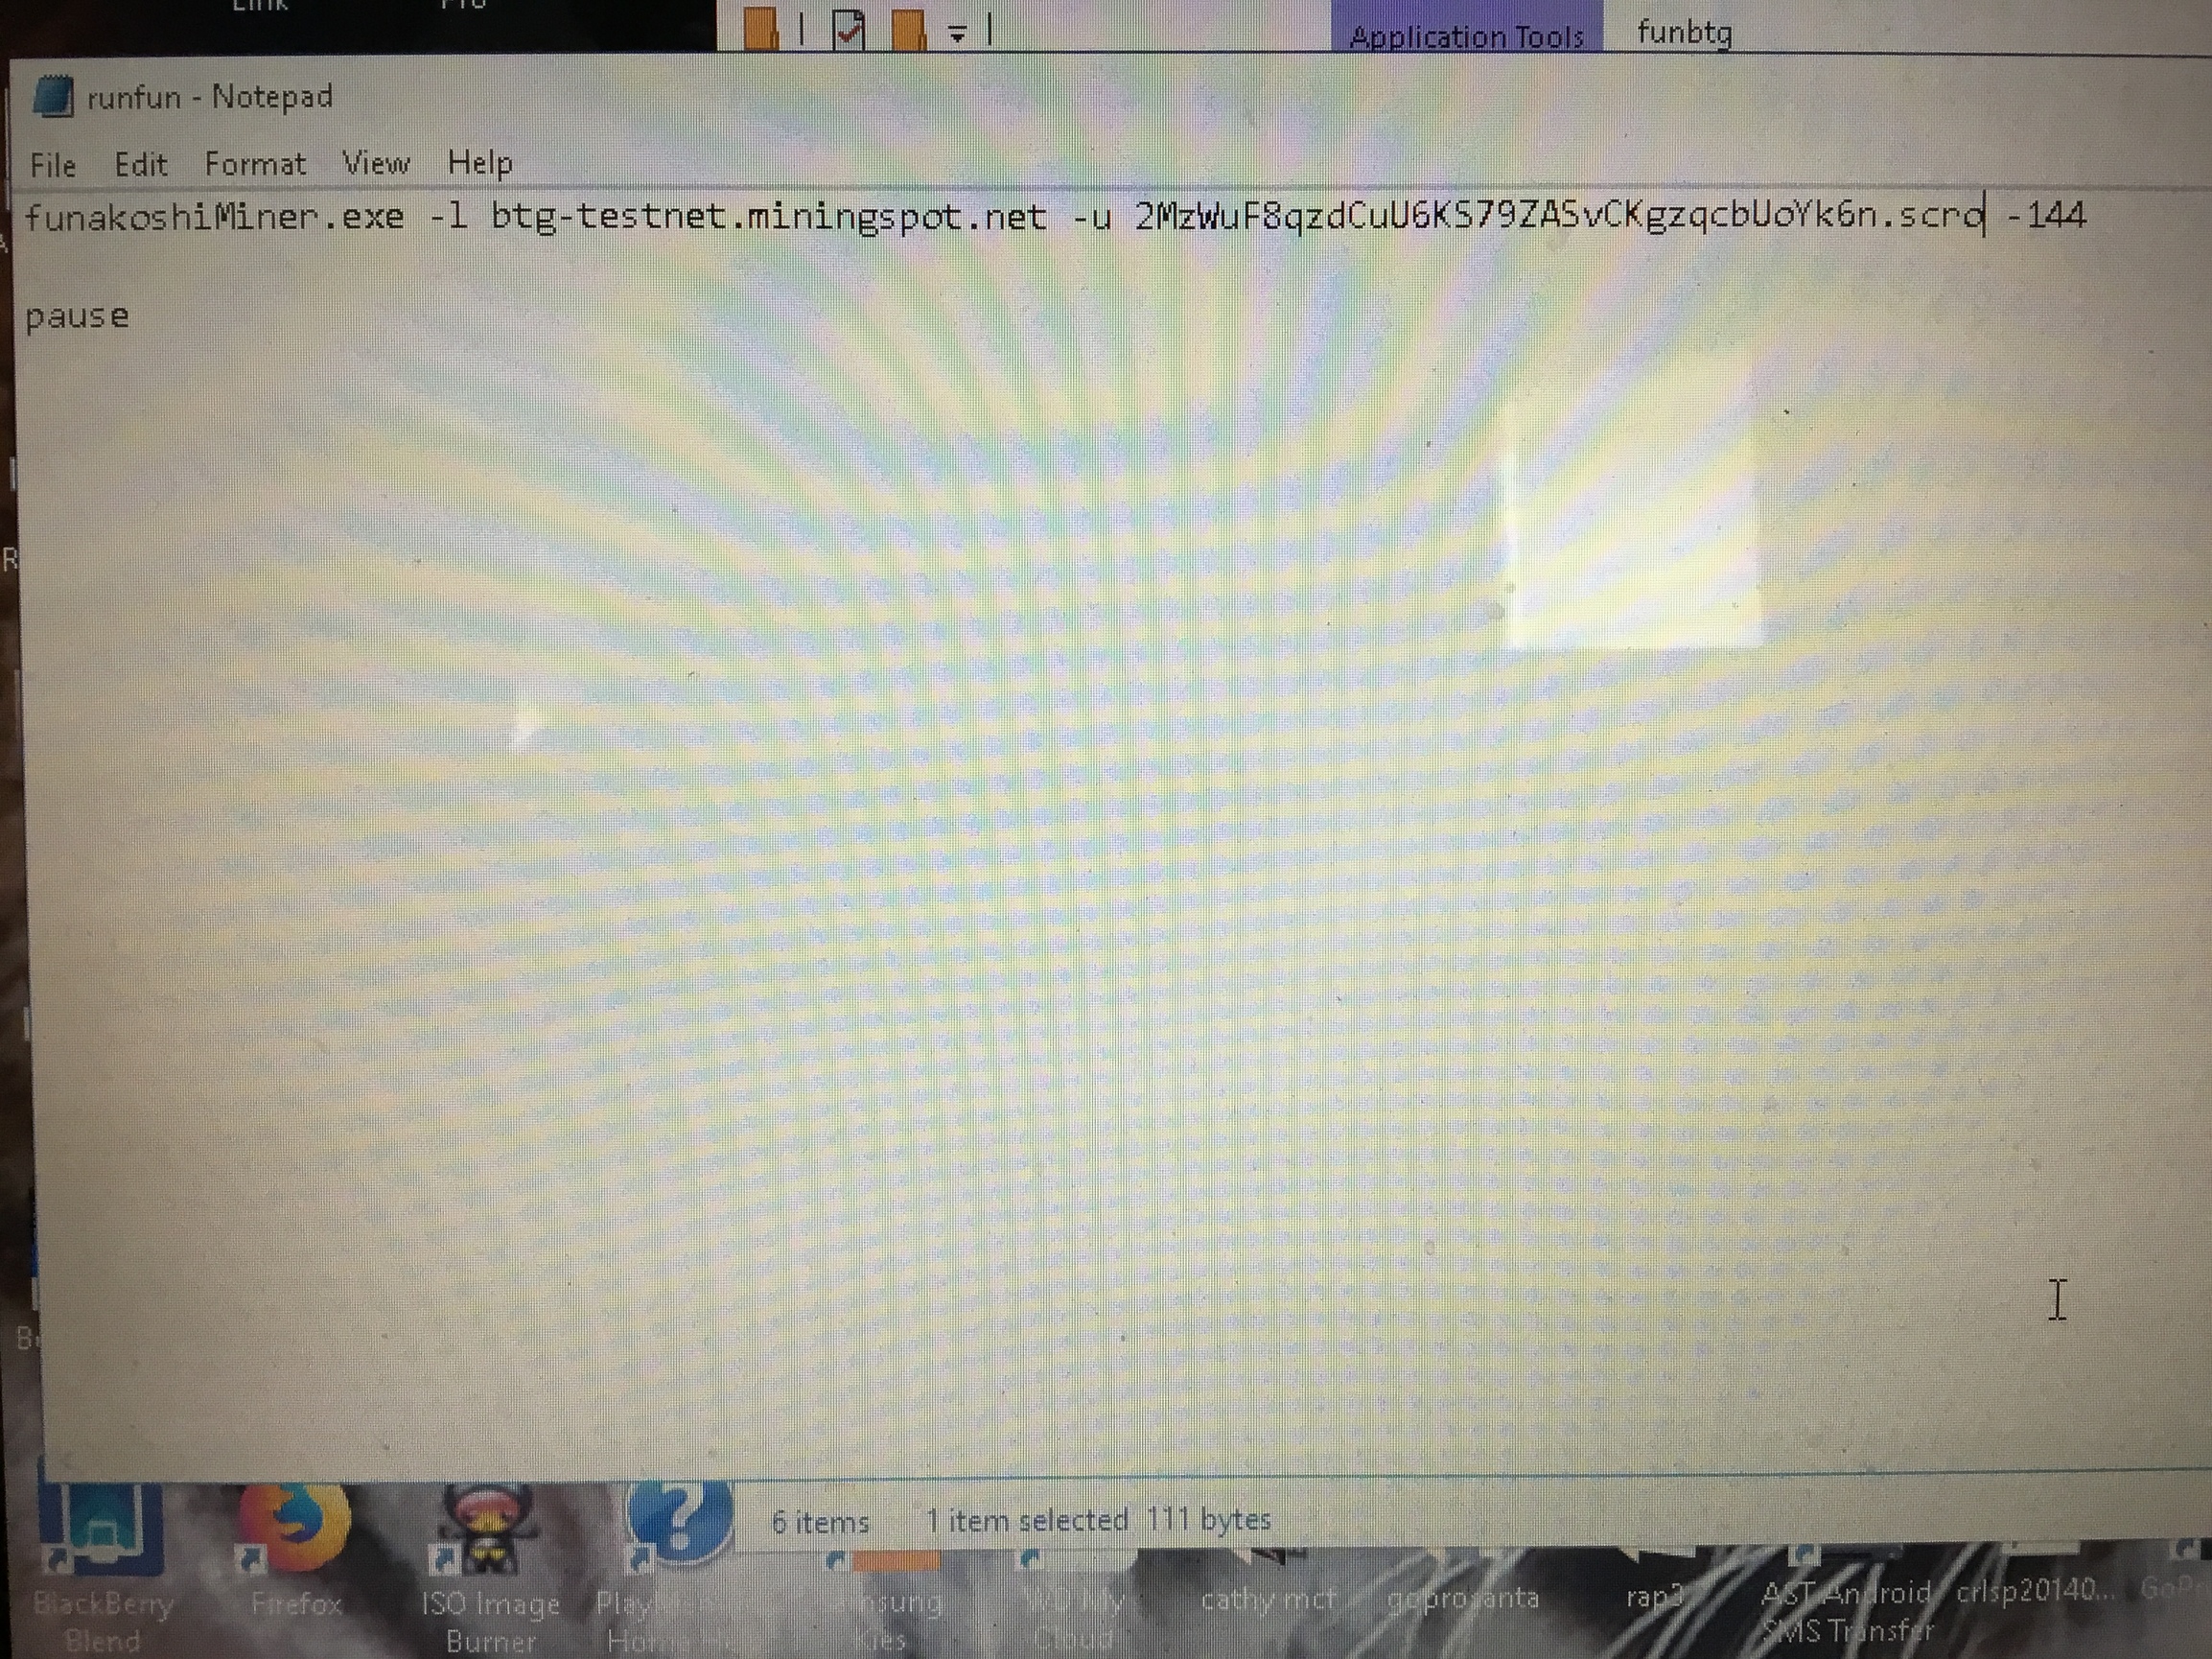
Things to remember:
- If you are using a different pool, add that info behind -l (small L)
- Please use your own wallet address that you created behind the -u
(4.3) Save the .bat file the same as described above.
-File
-Save As
-File Name runbtg.bat
-Save as Type change this from Text Documents to All Files
When you want to run the program, Click on Runbtg (or whatever you called it)
(5) How is my miner doing?
To check the progress of your miner, go to the pool web site, either:
http://btg-testnet.miningspot.net/
https://test-pool.bitcoingold.org/
Click on MINER STATS or Worker Stats
Put your wallet address in where it says MINER LOOKUP

Your graph should load with your miner info.
(6) IT’S EXPLORER TIME
After you have mined for a while you might want to see the transactions, just to see everything works ok.
AGAIN, THESE ARE ONLY TEST COINS THAT HAVE NO VALUE
Disclaimer: All 3rd party tools, use at your own risk.
Please head on over to our explorer.
https://test-explorer.bitcoingold.org/insight/
Copy/Paste your test wallet shown address where it says search for block, transaction or address below:

When you hit Enter, the explorer will show a summary of that wallet address activity, and below that, it will show every transfer in and out of the address.
I hope this tutorial has helped, good luck for the testnet and I look forward to talking with many of you when the mainnet is up and running!
If you need help, we are here for you.
Kind Regards,
Blackbox