Updated Feb 11, 2021
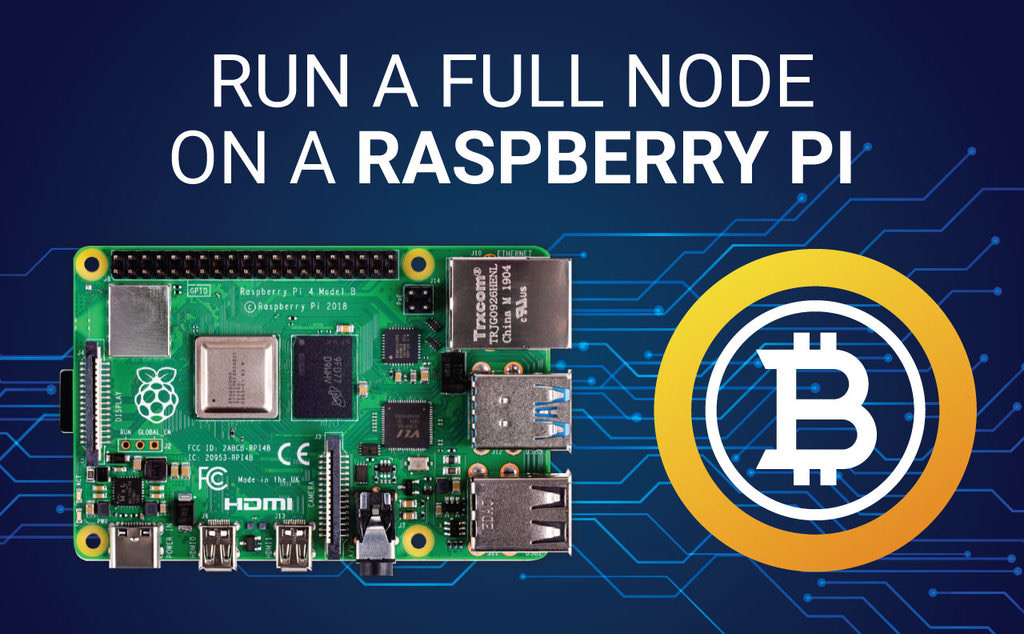
Hey Everyone, Blackbox here and I am super excited to bring you this tutorial. Imagine running a full node ( Wallet) that uses only between 1-2 watts! This is amazing! In this tutorial, I will make this as simple as possible to get you up and running with little or no issues.
For this tutorial the Raspberry Pi that i will be working with is the 3B.
Approximate completion time, 1 hour
Downloading and flashing SD card 15-20 min
Rest of install: 45 min
Things needed;
NOTE: You will need a SD card reader, either external or some laptops have them built in
( 1 ) Hardware:
-
Raspberry Pi kit, or Raspberry Pi 3b, b+ or the new model Raspberry Pi 4
-
A 256gb Sandisk micro SD card This will be used for the OS and you will also be installing the whole blockchain on here!
-
One Usb stick, for this I have a 32gb stick, but even as low as an 8gb one would work. This will be used as a Swap drive
I would recommend purchasing the kit. I find it gives the best value for the dollar and it comes with 90% of what you need.
The kit contains;
-
Raspberry Pi
-
SD card with NOOBS ( I don’t use this one)
-
Case for the Pi ( it might be a good idea to get a case with a fan on it)
-
Power adapter
-
HDMI cable
-
Keyboard/ mouse combo
I was looking online at all the different kits available and there are several kinds to choose from.Just make sure you have all the components listed above as well as Sd card and USB stick.
( 2 ) Software
This is easy. To set up the Pi we only need 2 different external software Raspbian the OS and Etcher or similar product.
To get Raspberry Pi OS ( Formally Raspbian) click Here
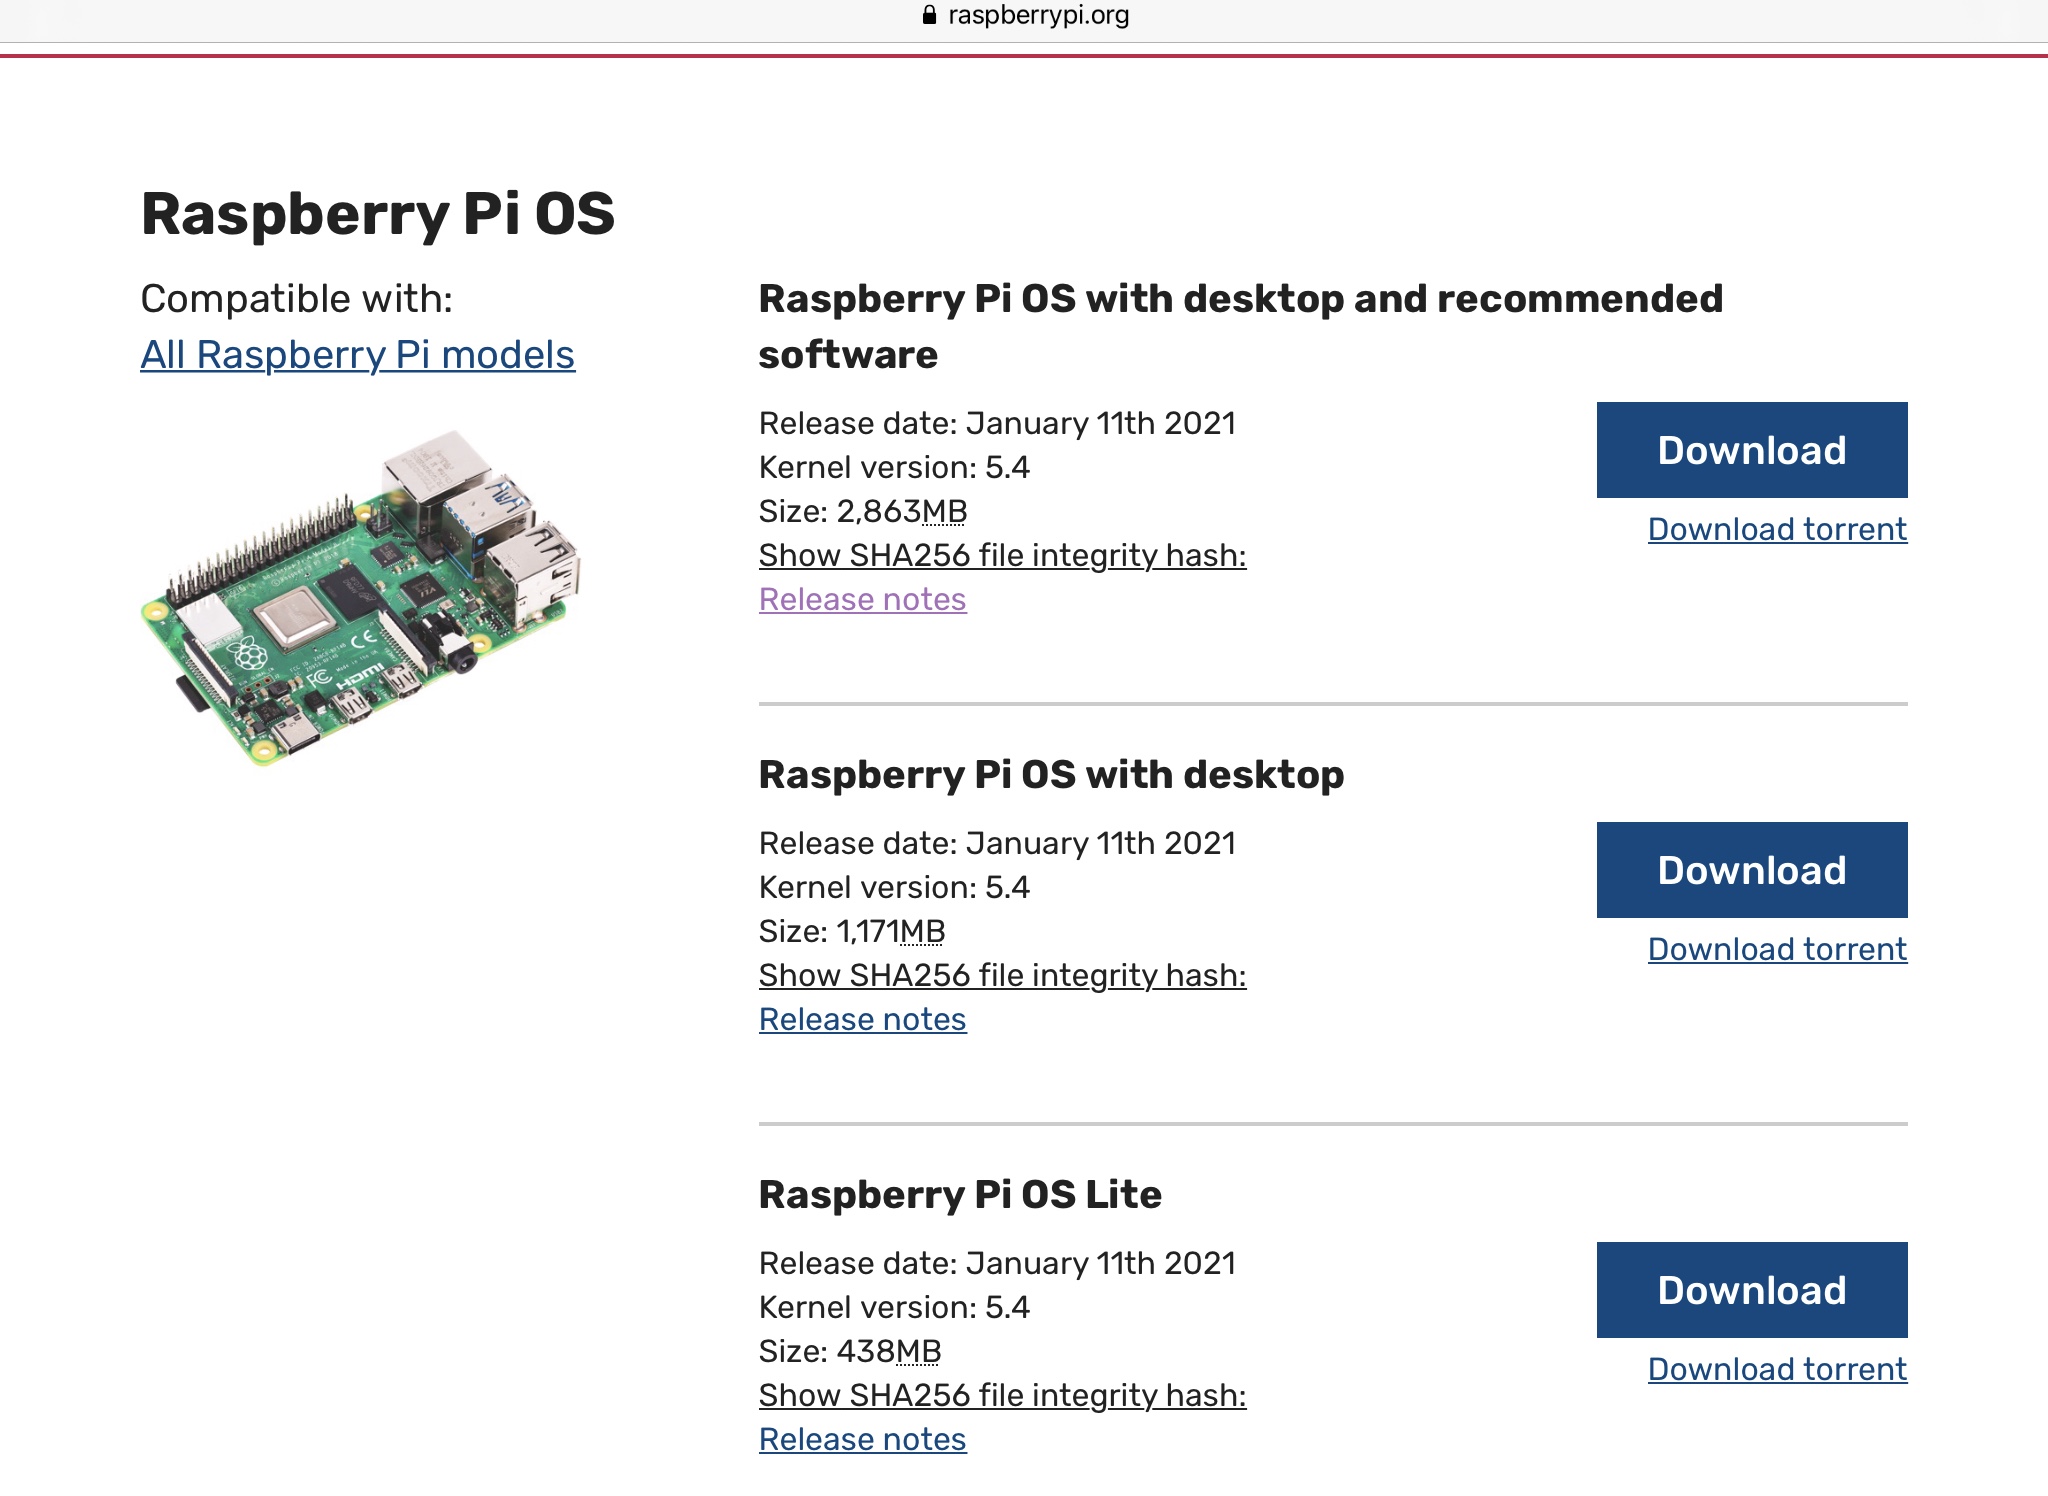
Download the zip file and remember where you saved it.
Note
(2a) As of Jan 2021, Raspberry has come out with its own imager found on the above link. You can either use it or continue to use the one below.
Get Etcher here
And install.
Are we ready?
Allright, now that you got everything that is needed, let’s get to it.
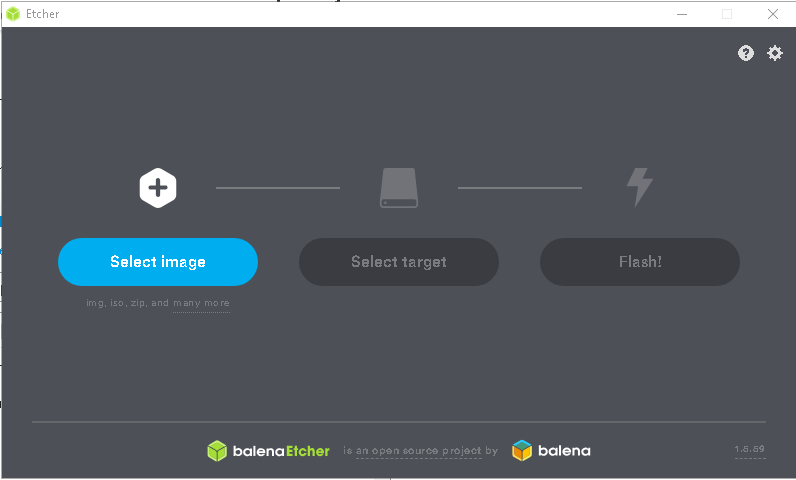
( 3 ) Insert your SD card and Run the BalenaEtcher program. Looks like this.
( 4 ) Select Image , the zip file that you downloaded.
( 5 ) Select Target (To the right)
Important:
When choosing a target make sure you choose your SD card. Make sure it matches the SD card for size.
( 6 ) Once you have made sure you have the correct device (SD card) then hit the flash button. After it flashes the SD card, it will automatically verify it.
( 7 )Time for a coffee break or do some online browsing. It might take a bit.
( 8 ) Now might be a good time to build the Raspberry Pi if you haven’t done so already.
Be careful in handling the Pi as not to bend any pins.
-
Install Board into case
-
Insert wireless usb for keyboard/mouse
-
Connect Cat 5 cable
-HDMI connection
-
Do NOT connect power yet!
-
Now would be a good time to insert your empty USB stick.
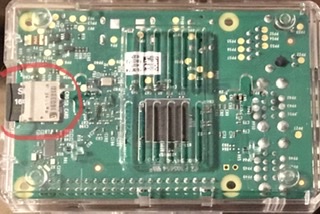
( 9 ) Ok, after your flash is done, remove your SD card and insert it into the Raspberry Pi. Make sure you insert it correctly as below.
( 10 ) Now that you have everything together lets make sure;
Pi board, case, usb stick, SD card, keyboard, mouse and HDMI cable.
**( 11 ) Now plug in the power.
After it boots up you will be greeted with the following screen;

Wait until the desktop loads, It should ask you if you want to set up location and timezone.
This would be a good idea.
**( 12 ) Set up a strong password ( IMPORTANT TO WRITE DOWN)
**( 13 ) Next, it will ask you to set up WIFI, I would do this later.
You are going to be downloading 160+ gb of data, so for now let’s use hard wired. If you only have wireless, then set up your wireless connection.
**( 14 ) Click next; it will now download and update your software for you and after it will ask you for a reboot.
Depending on your internet speed it might take a bit so be patient and let it do its thing.
Whatever you do, never power it off, just let it be.
Once it is updated it will show this screen.
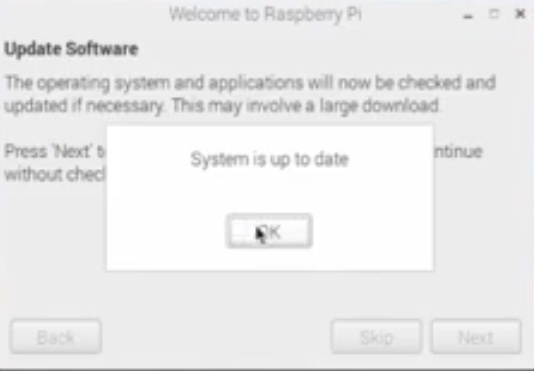
Click ok.
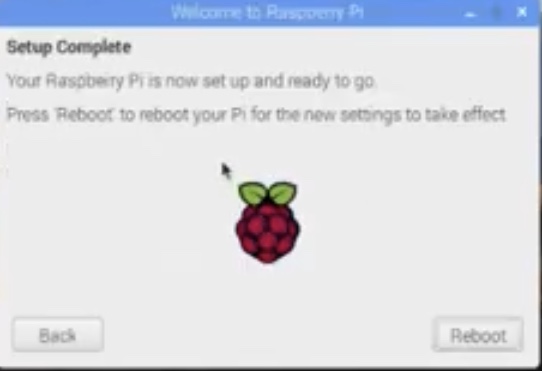
( 15 ) You now need to reboot.
Let the Pi Reboot… Well done everyone! We now have the Raspberry Pi up and running.
We are now going to do quite a few things to prepare your system to accept the Bitcoin Gold wallet.
If you are not familiar with the Raspberry Pi desktop just a quick explanation of a few things you need to know.
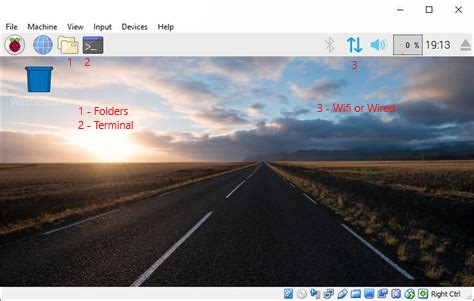
Above I have listed the 3 things you will need to know about.
1- Folders
2- Terminal
3- Wi-Fi
These are the main things we will be using.
With that being said, and with a full beverage of your choice… Let’s do this!
( 16 ) Click on Globe ( Internet) and go to this forum page on the Raspberry Pi
I will post most or all the commands so, all you need to do is copy and paste to make things as easy as possible. It is easy to make a mistake, it also saves a lot of time.
( 17 ) Let’s update the system
Bring up a terminal (2) type or copy/paste the following
sudo apt-get update
Grab a pen and paper as you want to make a reference in a bit.
Click on Terminal and when the window pops up type top
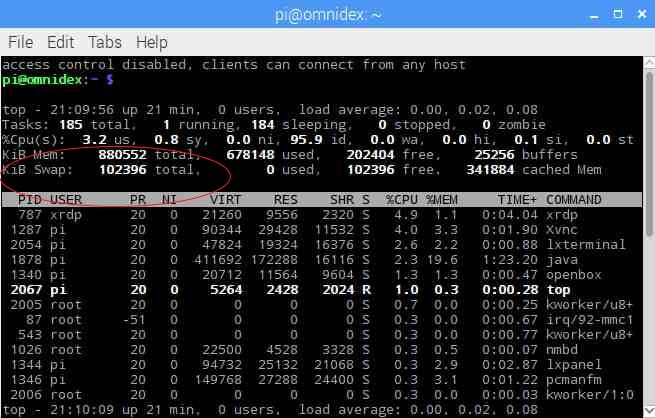
Write down the amount in swap area and keep this handy for a few minutes.
( 18 ) Now we want to prepare our usb stick to be used as additional memory for the Pi. We will need it or you will run into problems. We are going to install a partition utility program for this.
Copy/Paste
sudo apt-get install gparted
It will ask if it is ok to use additional disk space press ’ yes’
( 19 ) Now we will need an editor program to enable the mounting of the usb stick every time you start the Pi. So this will make it automatic instead of always manually adding the swap drive.
Copy/Paste
sudo apt-get install gedit
It will ask again about using additional disk space press ‘Yes’
( 20 ) Like in the picture go to the raspberry symbol, drop down, preferences then select gparted.
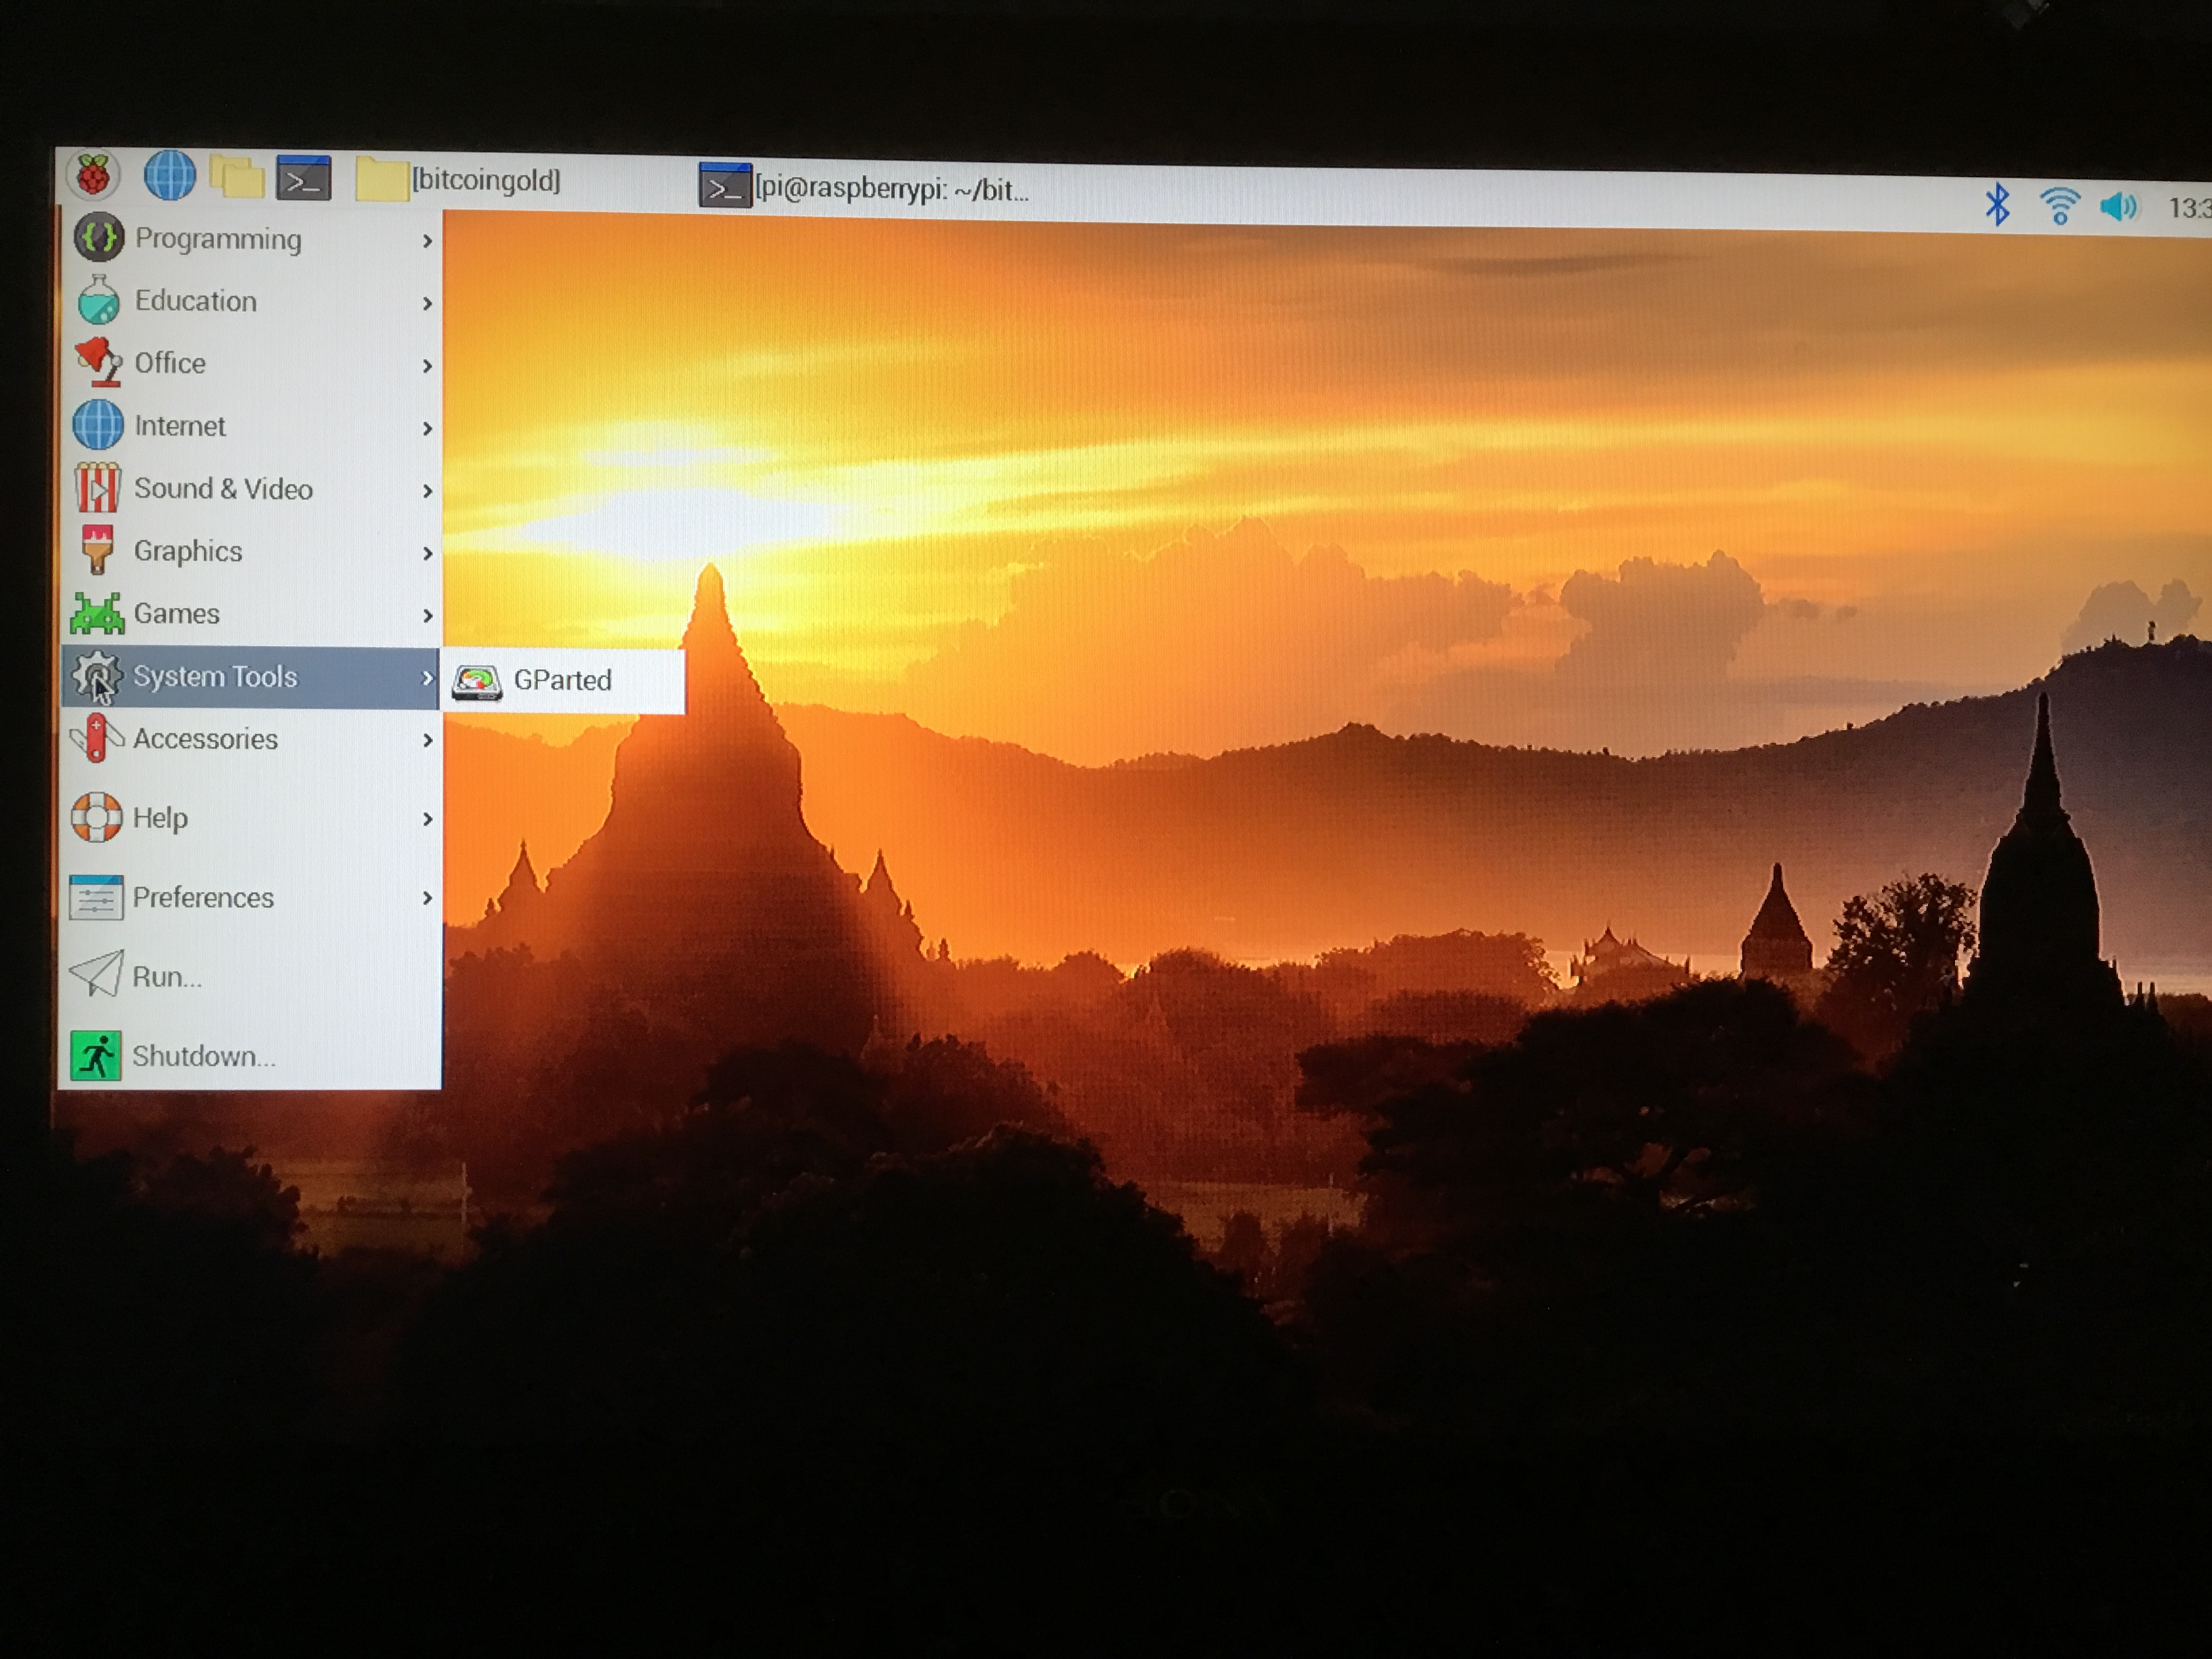
Here is where you will need your password, you know, the one you wrote down lol
This is what the gparted program looks like;
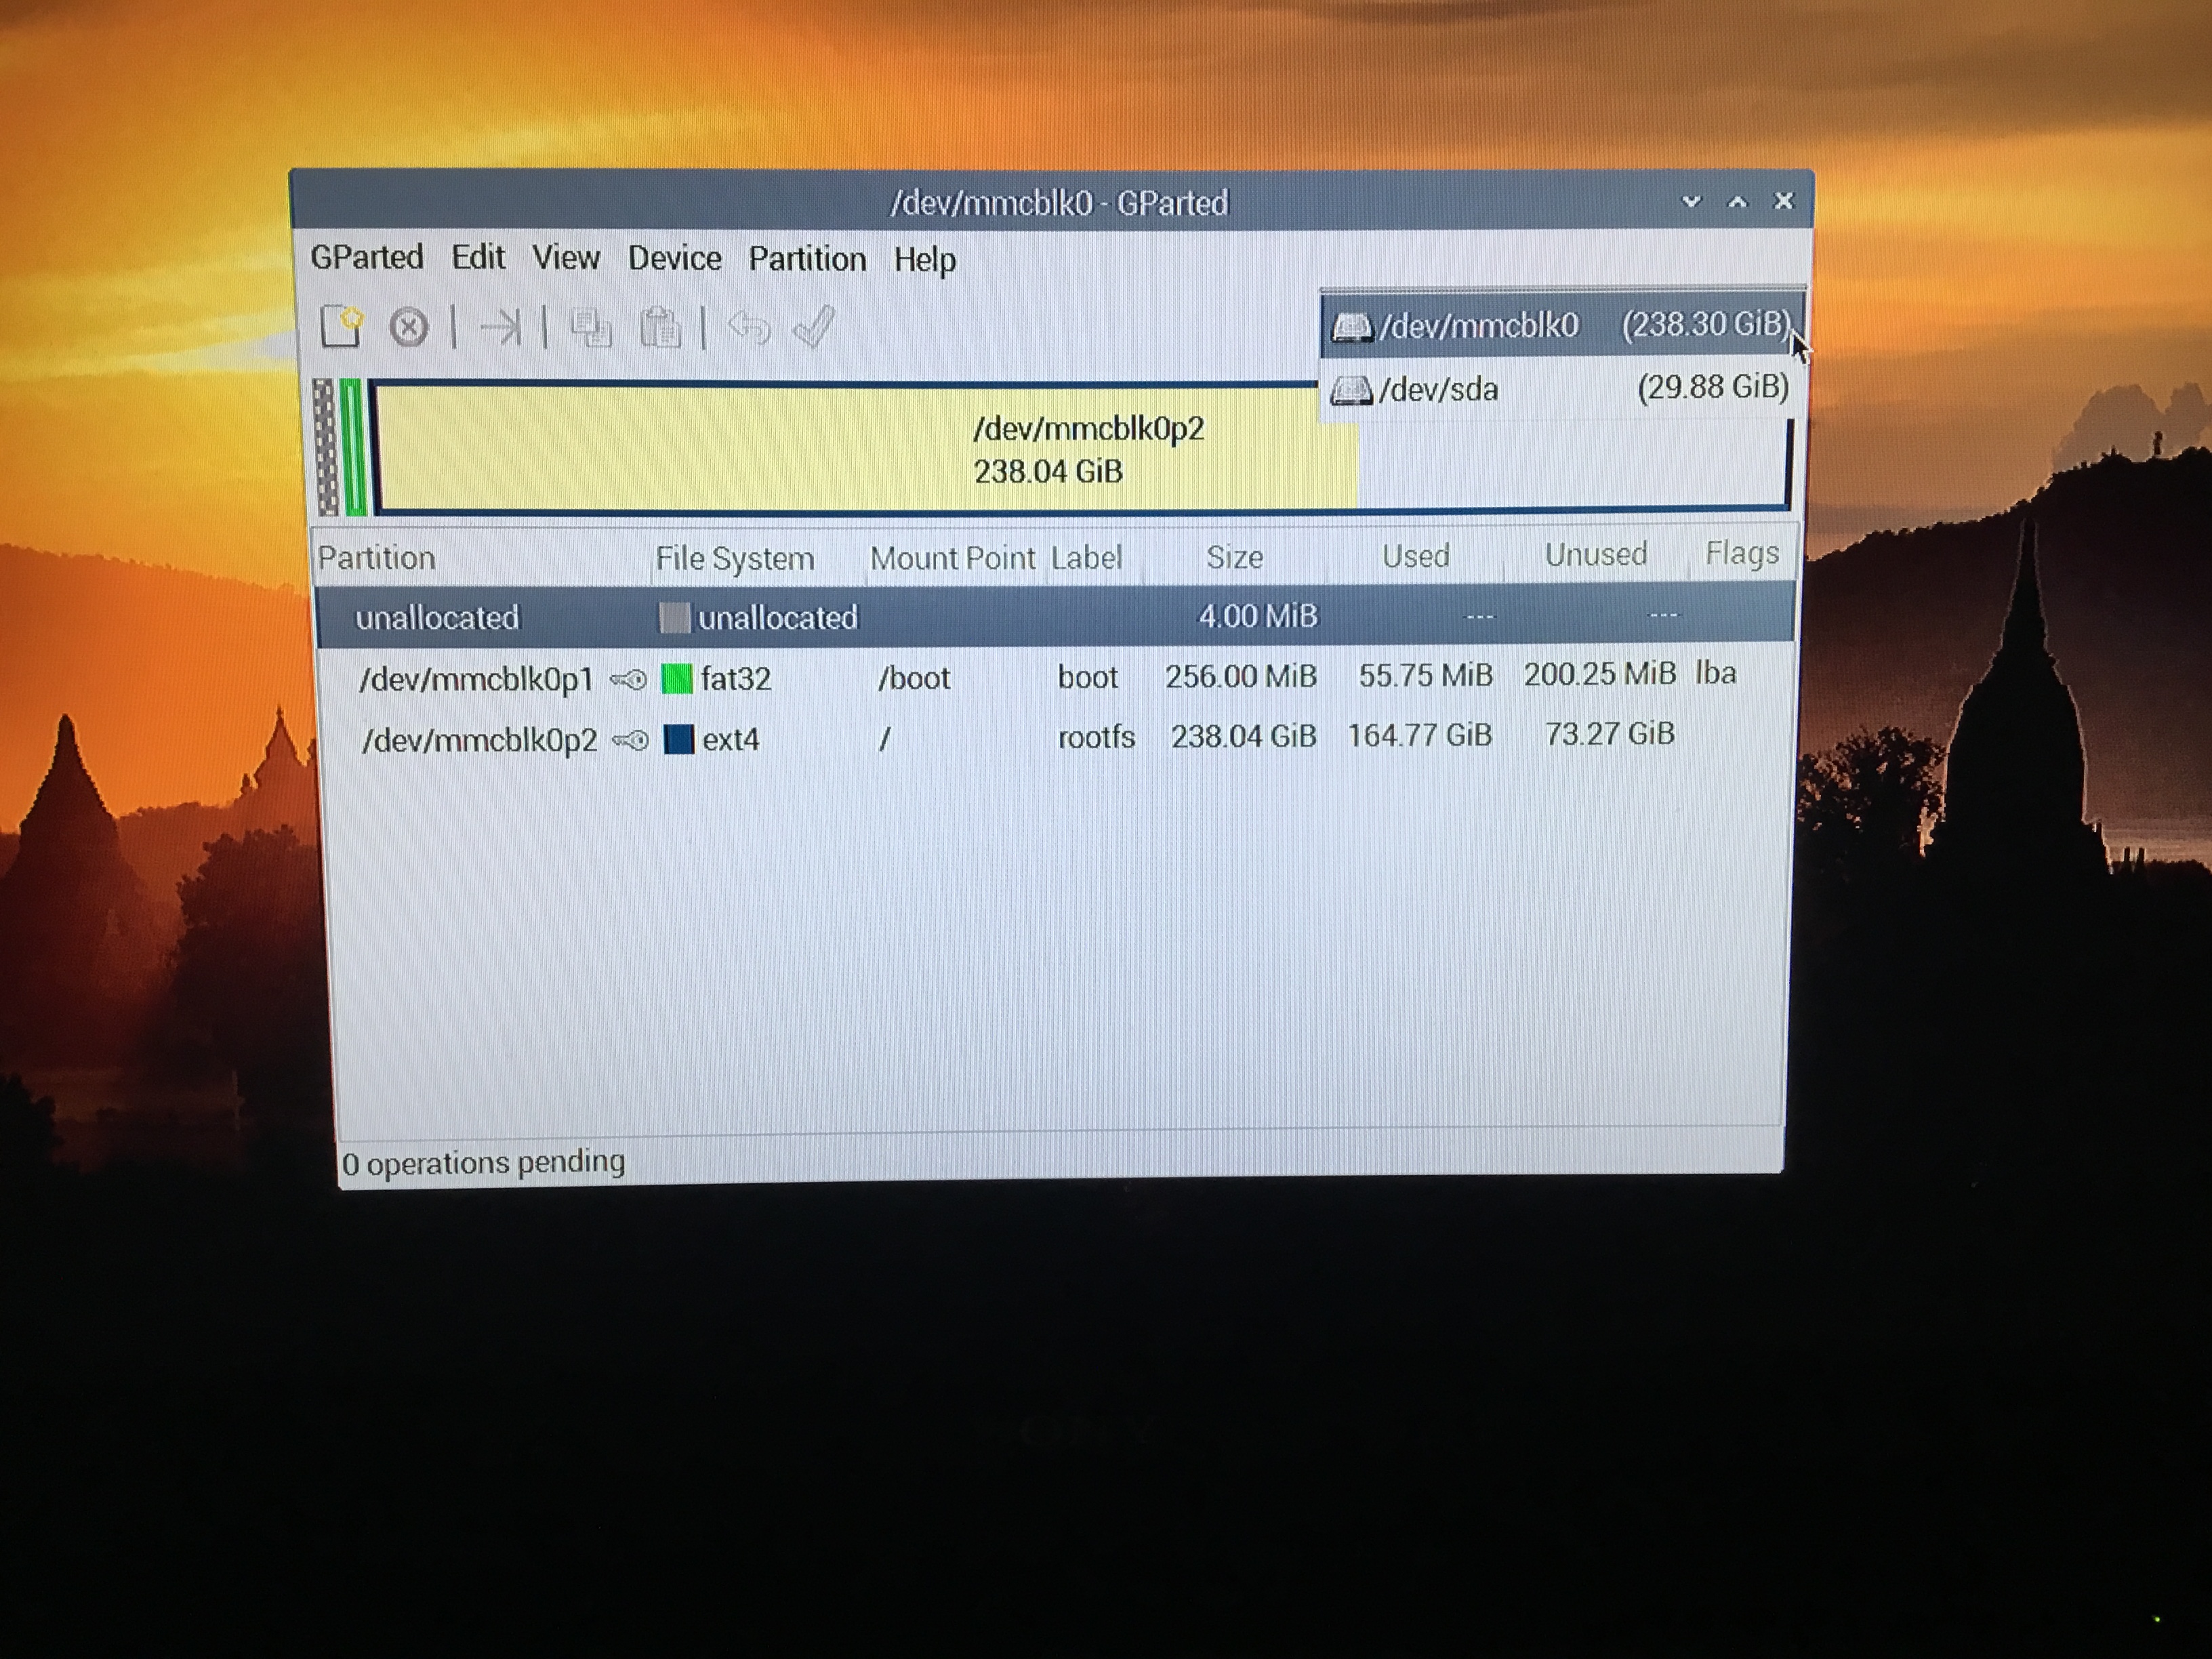
If you look to the top right there will be a drop down menu, the larger
(first ) one will be your SD card (OS). You need the second one. Match the memory. If your usb stick is 32gb, it should say ( /dev/sda 29.88 GiB) and it shows close to that ( it will always be a little less) so select the second one.
It will show on the screen in a big red or green rectangle.
A green rectangle just means that the usb has been used before and we need to unmount it.
(A) If it is a green rectangle, right click and unmount it. Then continue to (B)
( B) If it is red click in the rectangle and select format side menu and select Linux-swap
Click the green check mark. And close.
Once you have formatted the stick Right click on the red rectangle and on the drop down select Swapon
Now to make sure that it has worked, lets just take a look see.
Type top
The window will come up as before. Now bring out that paper you wrote on a few minutes ago. Take a look at the swap and it should be a lot larger of a number. If it shows a larger number, FANTASTIC! You did it! Now you won’t run out of memory so, please continue. If not, then you will need to go back to #20 again and redo, no biggie.
So, now what we have to do is make it so that every time you reboot the Raspberry Pi, it will automatically recognize the usb stick as a swap drive.
Don’t close any windows
**( 21 ) ** If you have a terminal window open, you will need to
copy/paste the following
sudo gedit /etc/fstab
This will open another window like the one below.


( 22 ) Okay, you will need the two windows that are open just like the ones above.
Copy this below
UUID= YOUR USB UUID HERE none swap sw 0 0
and paste it so it looks like this.

( 23 ) Now, go to the other window (Gparted) and within the rectangle right click and in the drop down select information as you see below.
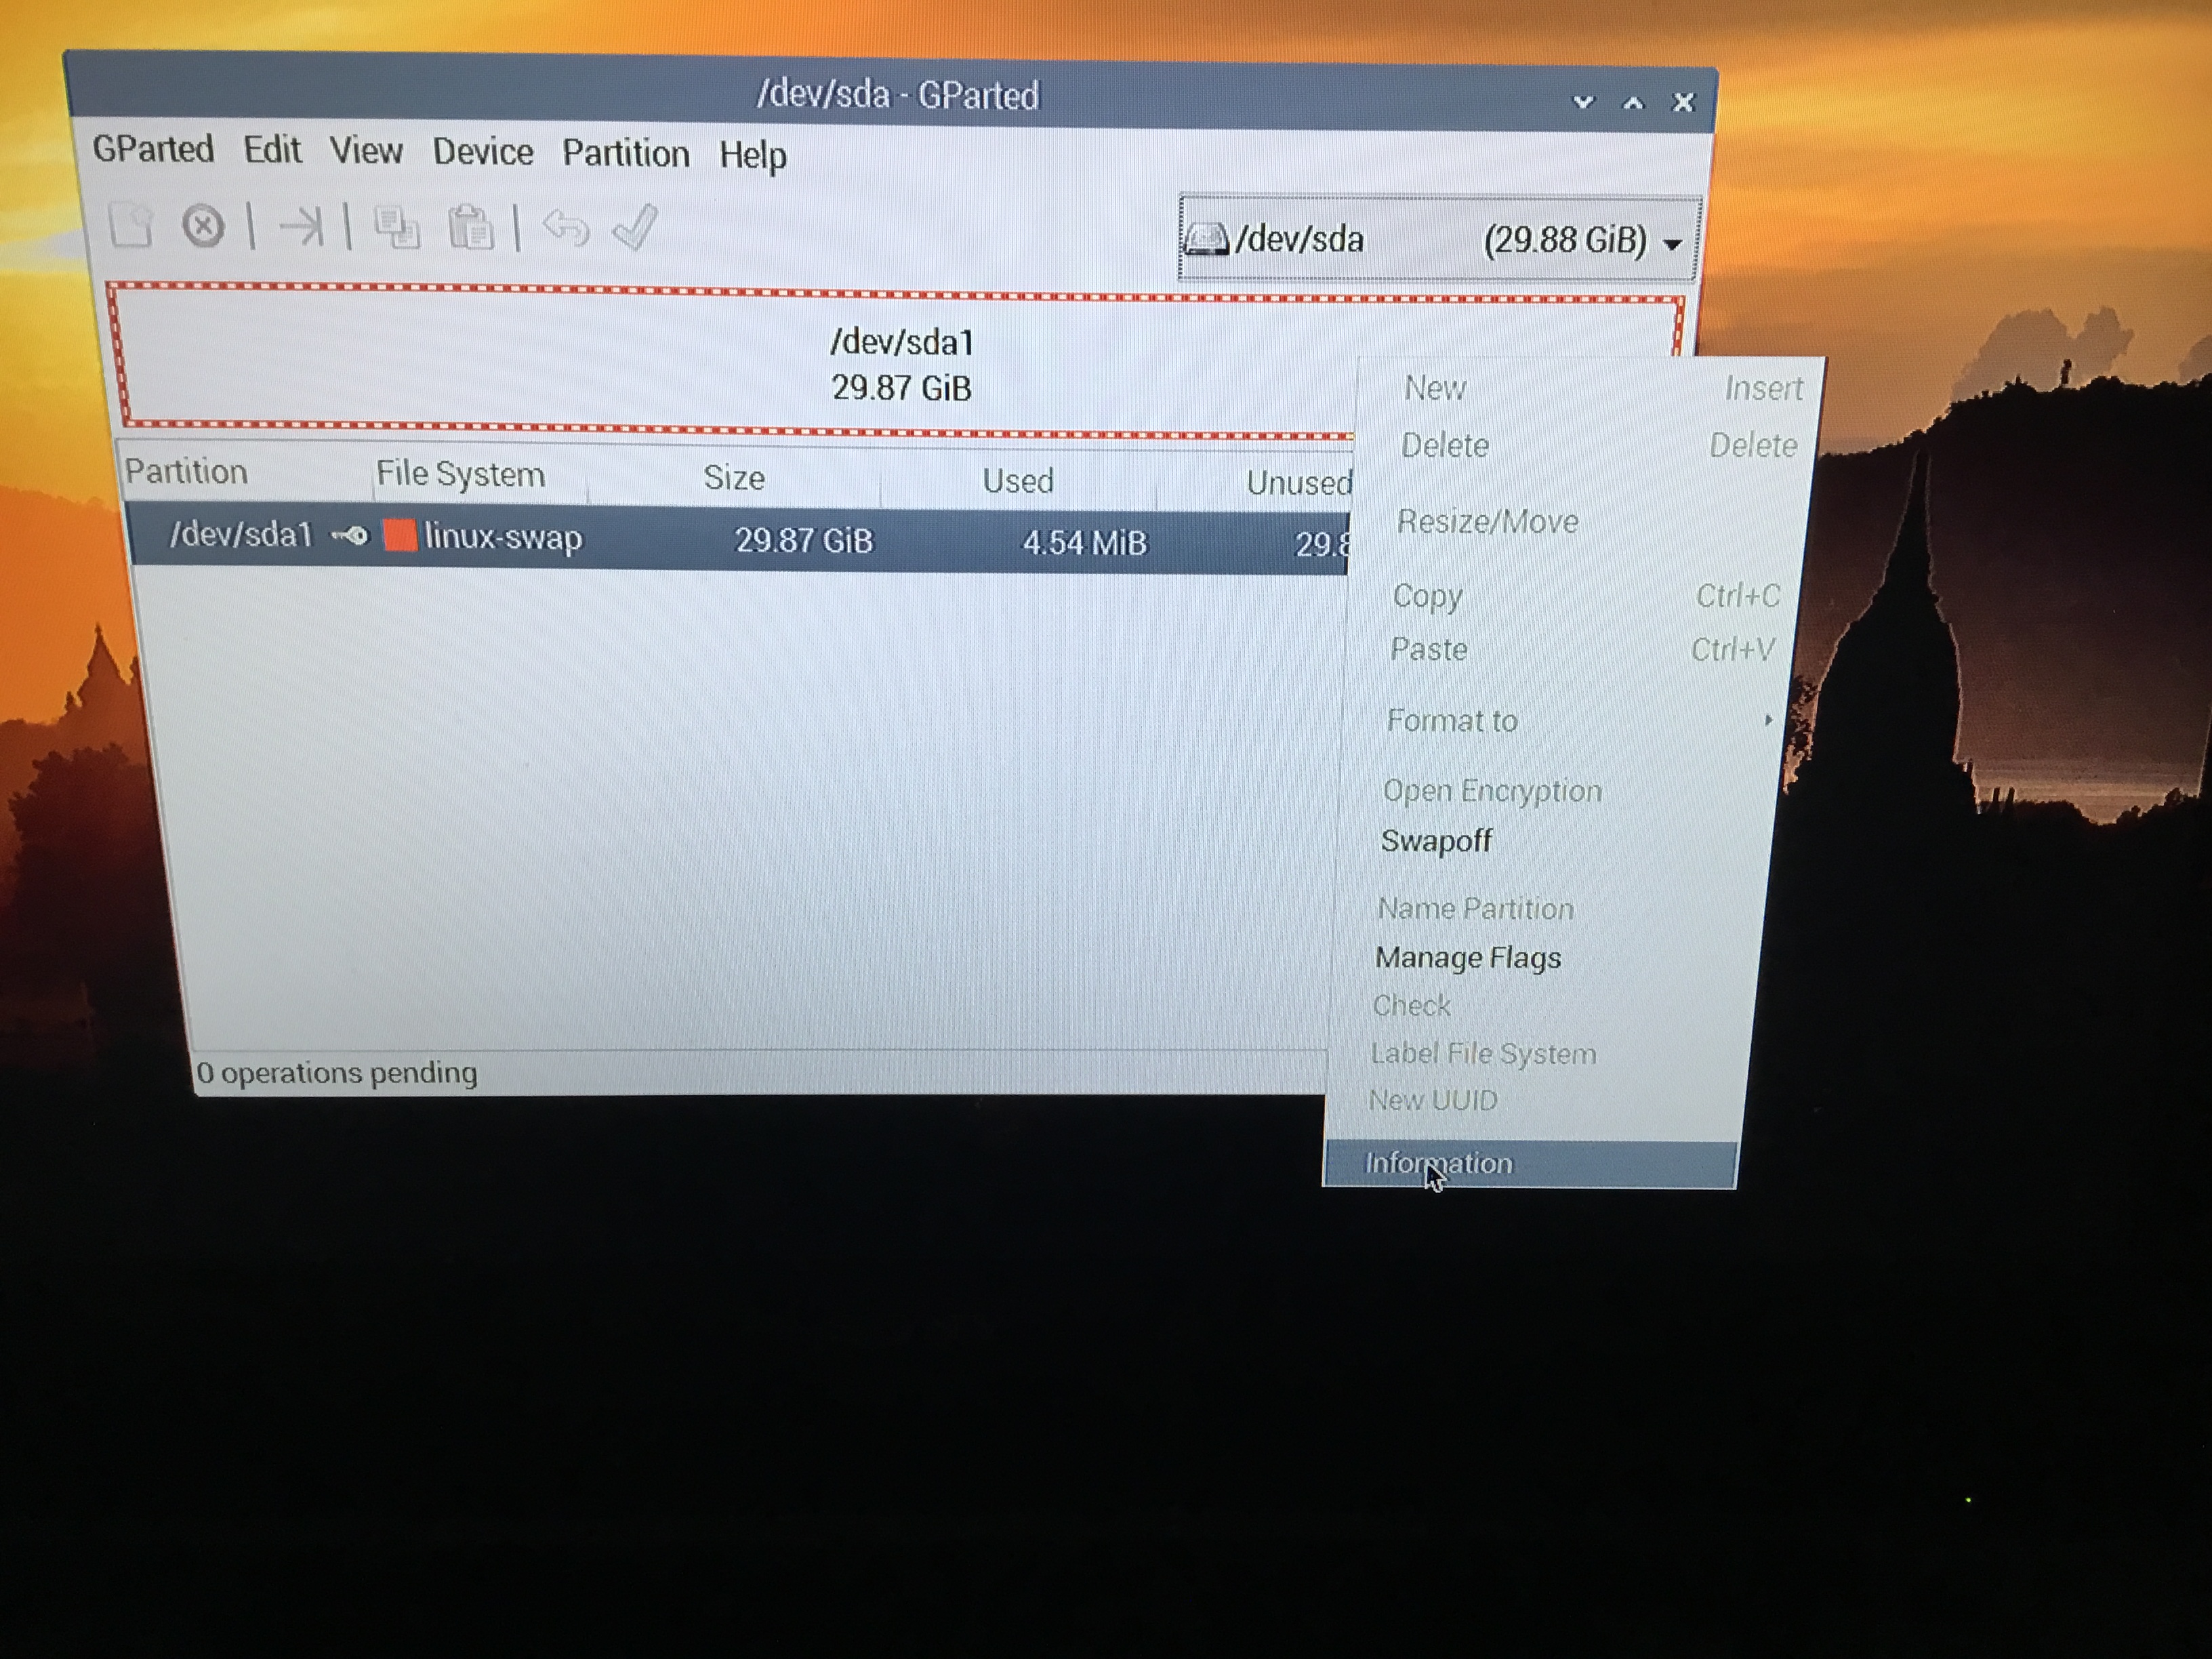
You will now see a window that looks like this.
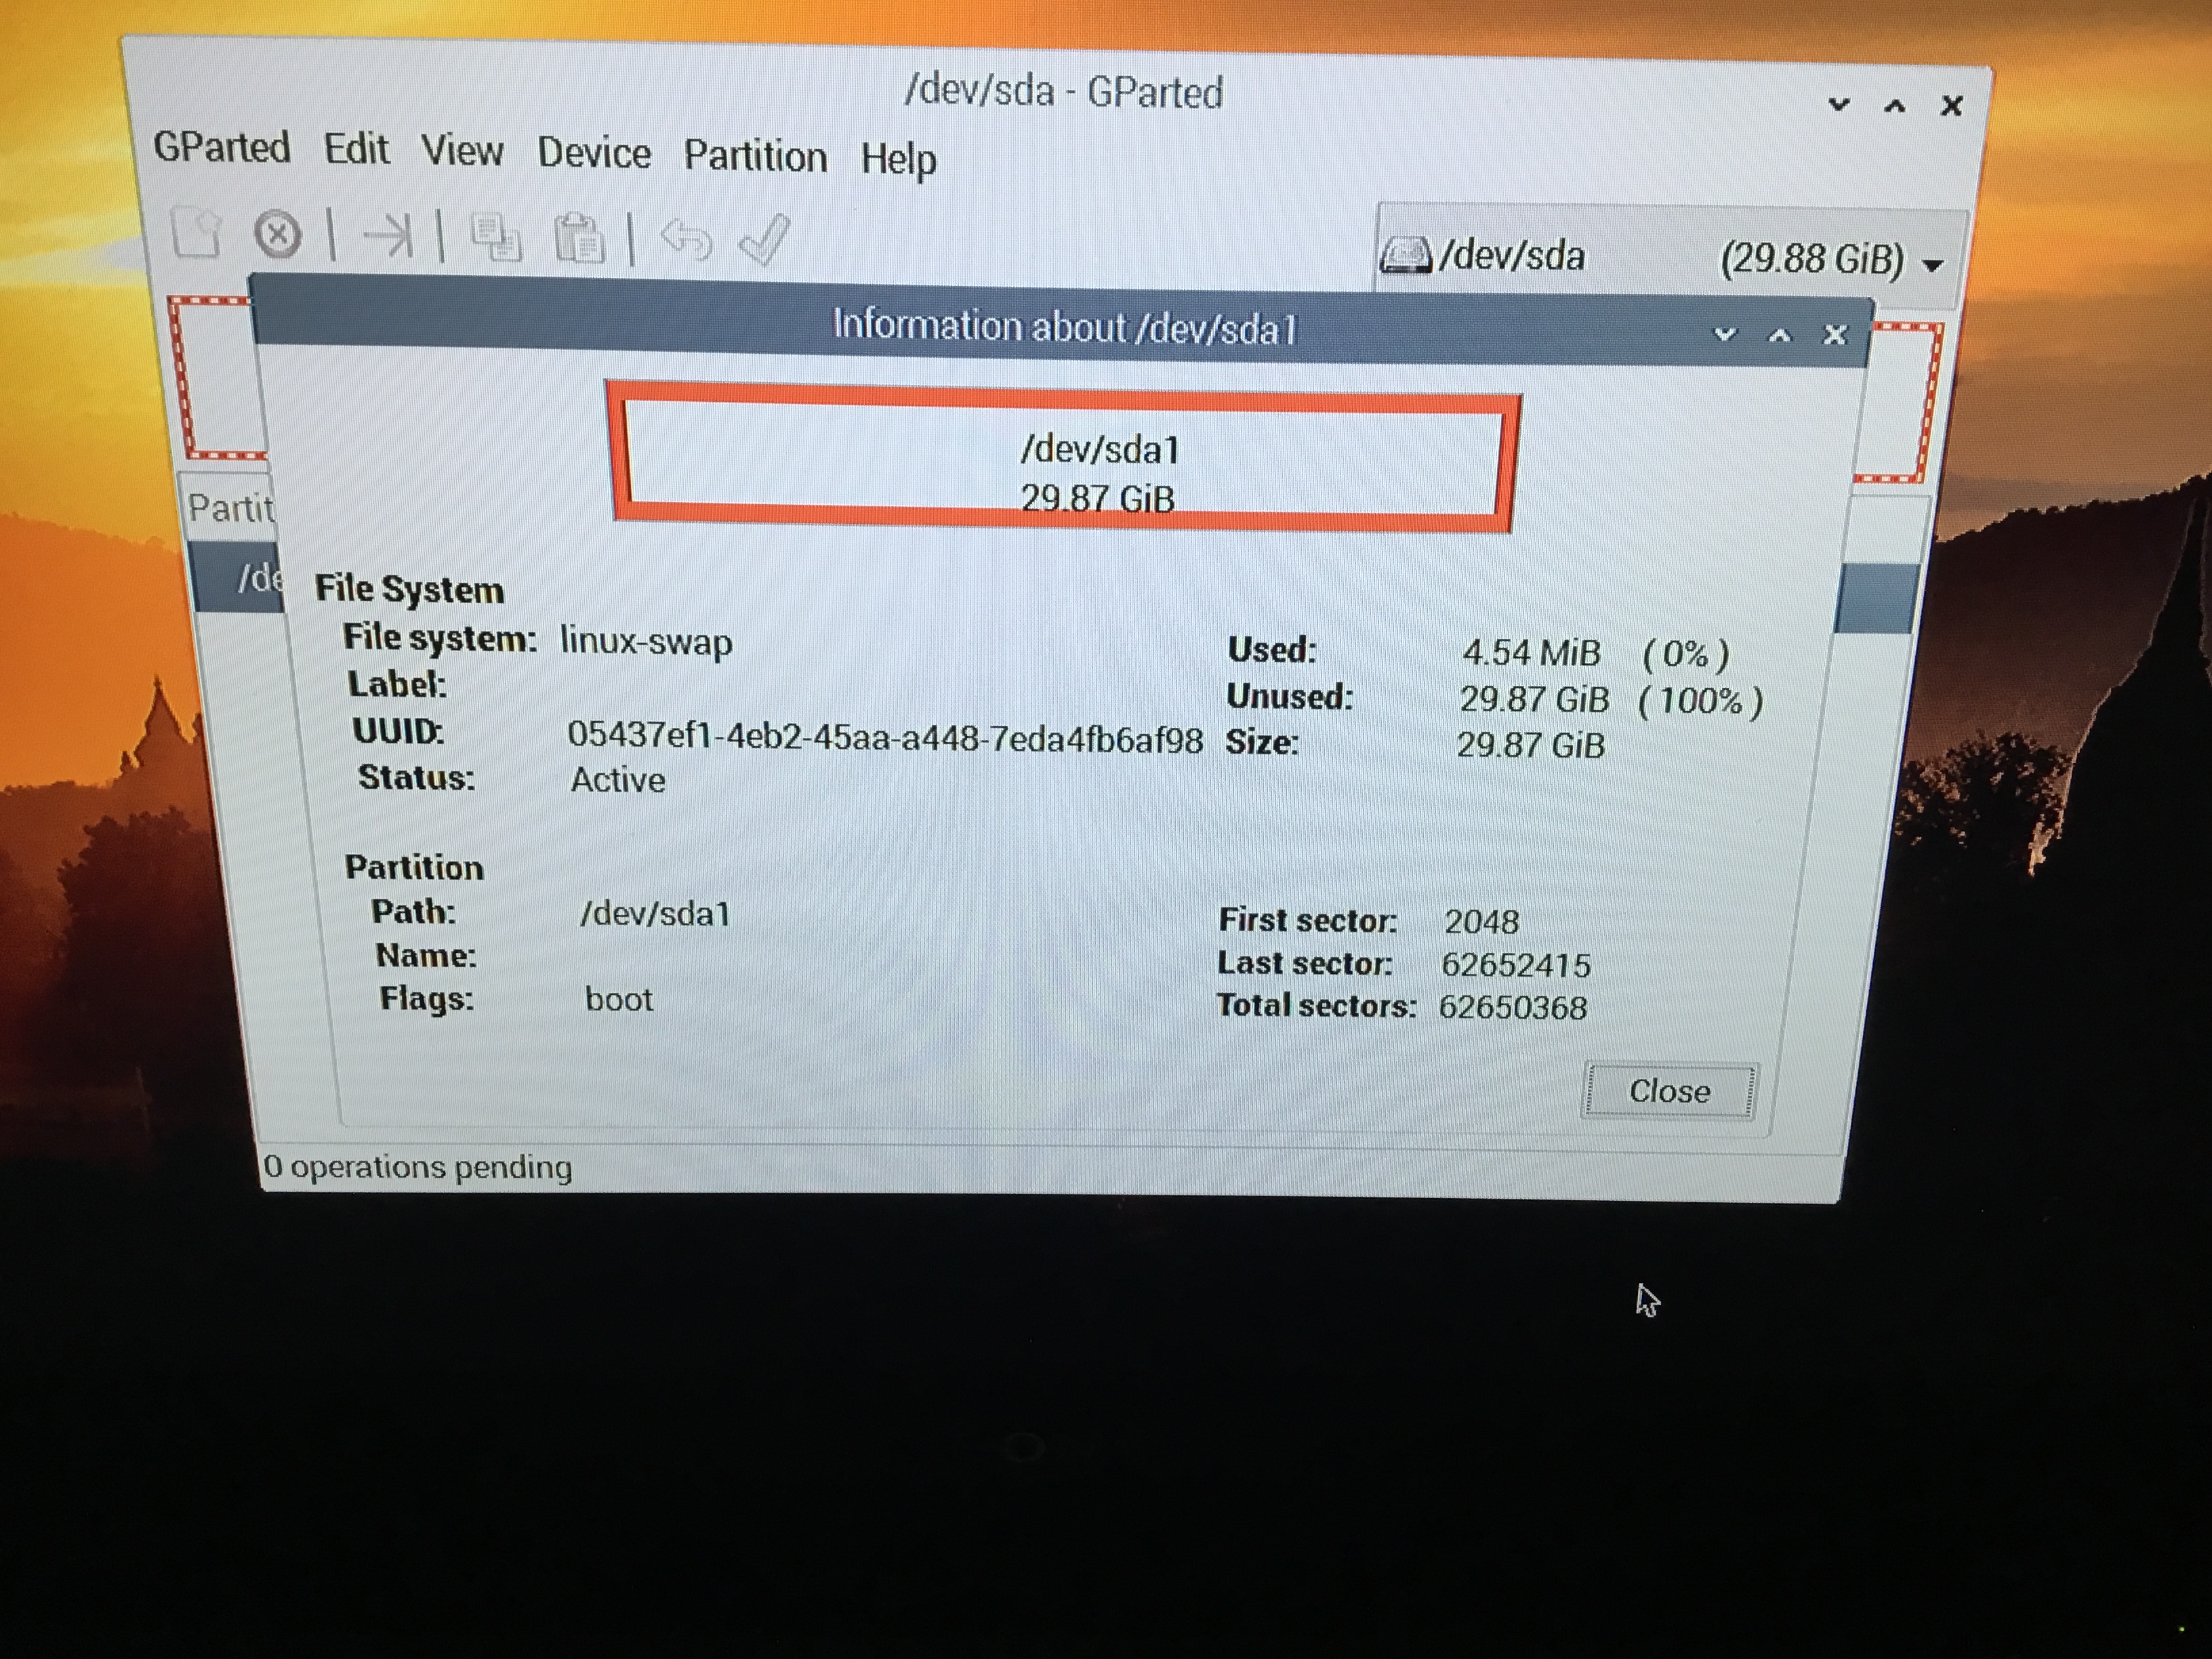
Where it says UUID highlight the whole line like this.
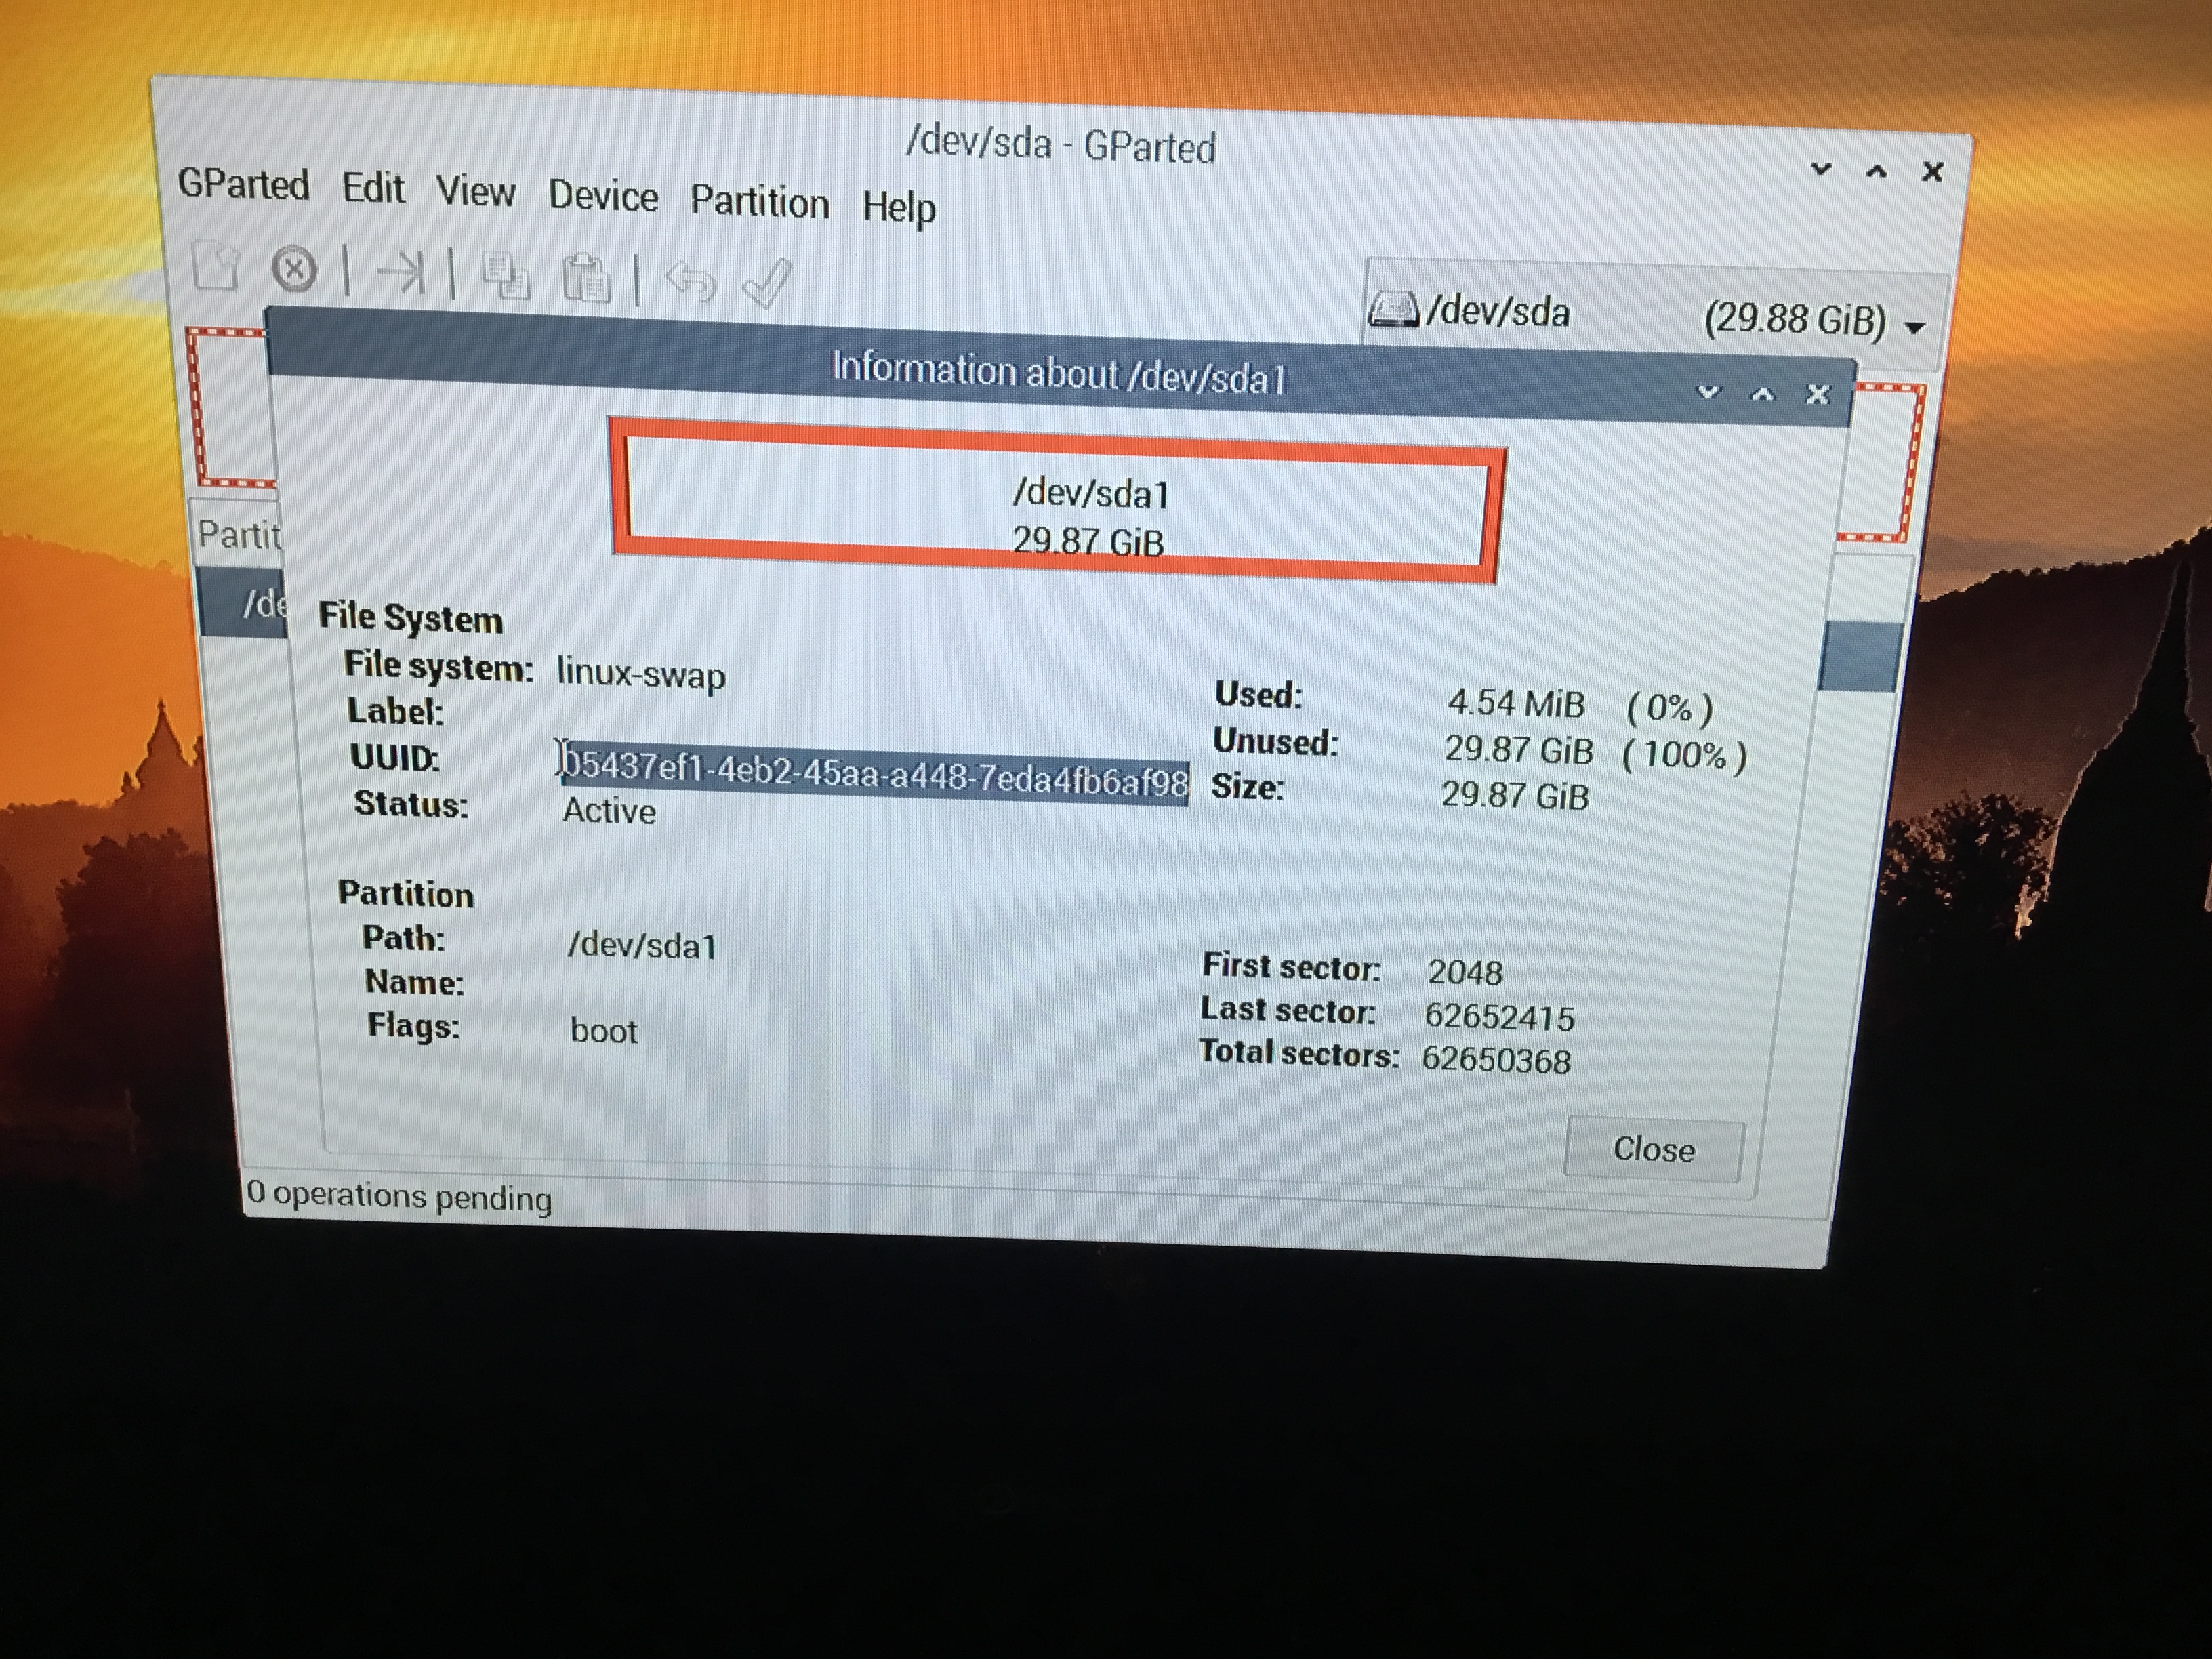
Copy it.
( 24 ) Now go back over to the other window.
Paste it exactly as below
UUID=PASTE-YOURS-HERE
| |
UUID=05437ef1-4eb2-45aa-a448-7eda4fb6af98 none swap sw 0 0
The above is what the line will look like.

( 25 ) Press Save
Great Job! We are almost there!
( 26 ) Get a terminal window up
Type mkdir bitcoingold
This will create a folder under Pi
Close terminal
( 27 ) Click on the internet (Globe) to bring up the web
( 28 ) Go to Bitcoin Gold website and to the wallet page
Look at the area circled in red;
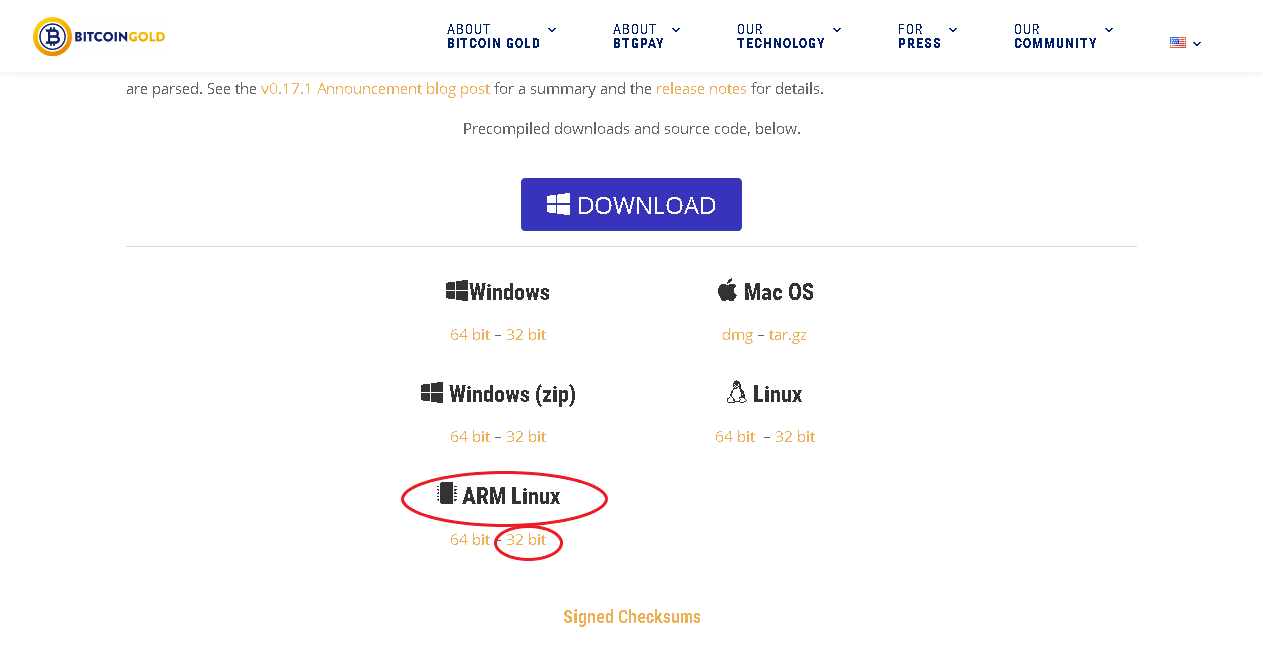
( 29 ) Download the 32-bit version that looks like below.
bitcoin-gold-0.17.3-arm-linux-gnueabihf.tar.gz
It will be saved in the Downloads folder.
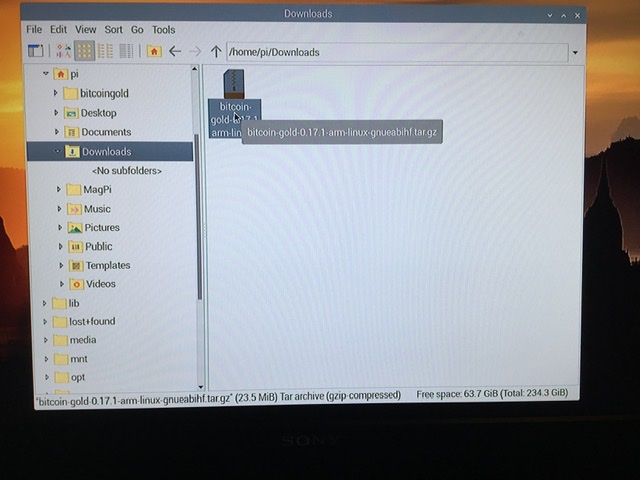
( 30 ) Copy the zip file from download folder and paste it over in the bitcoingold folder you just made.
( 31 ) You should be in the bitcoingold folder, right click on bitcoingold like the picture below.
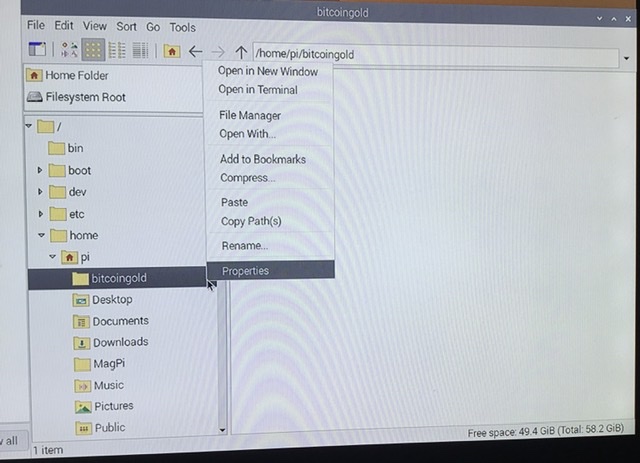
Select second from the top Open in Terminal
A new Terminal window will open, this time type the following;
ls (small L)
This is what it looks like:
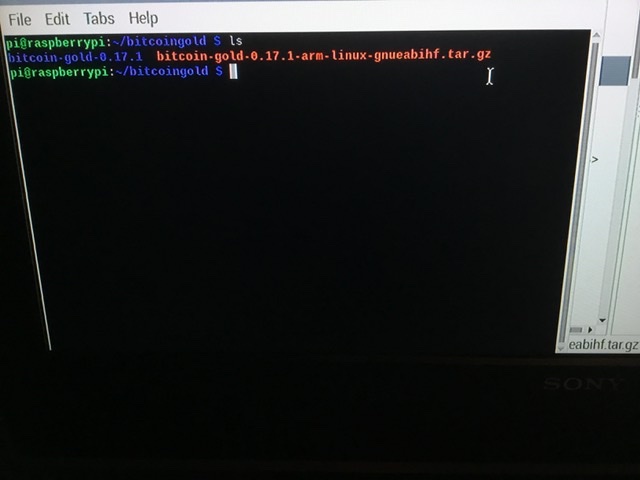
Now copy the area in red, make sure to get it all .
On the same terminal window type the following:
| info only. Paste what you just copied above.
tar xvzf bitcoin-gold-0.17.3-arm-linux-gnueabihf.tar.gz
That will extract the program into your folder.
Now, what we need to do is get into your new folder. Type the following
cd bitcoin-gold-0.17.3
Once you are in that window we have 2 options (1) Run terminal (2) run the wallet to send/receive BTG. Copy and paste your choice
(1)
if [ $(whoami) == ‘root’ ]; then echo “NO don’t run as root”; else cd bin && ./bgoldd; fi
(2)
if [ $(whoami) == ‘root’ ]; then echo “NO don’t run as root”; else cd bin && ./bitcoin-qt; fi
If we did everything correctly, then give yourselves a big pat on the back. Job well done!
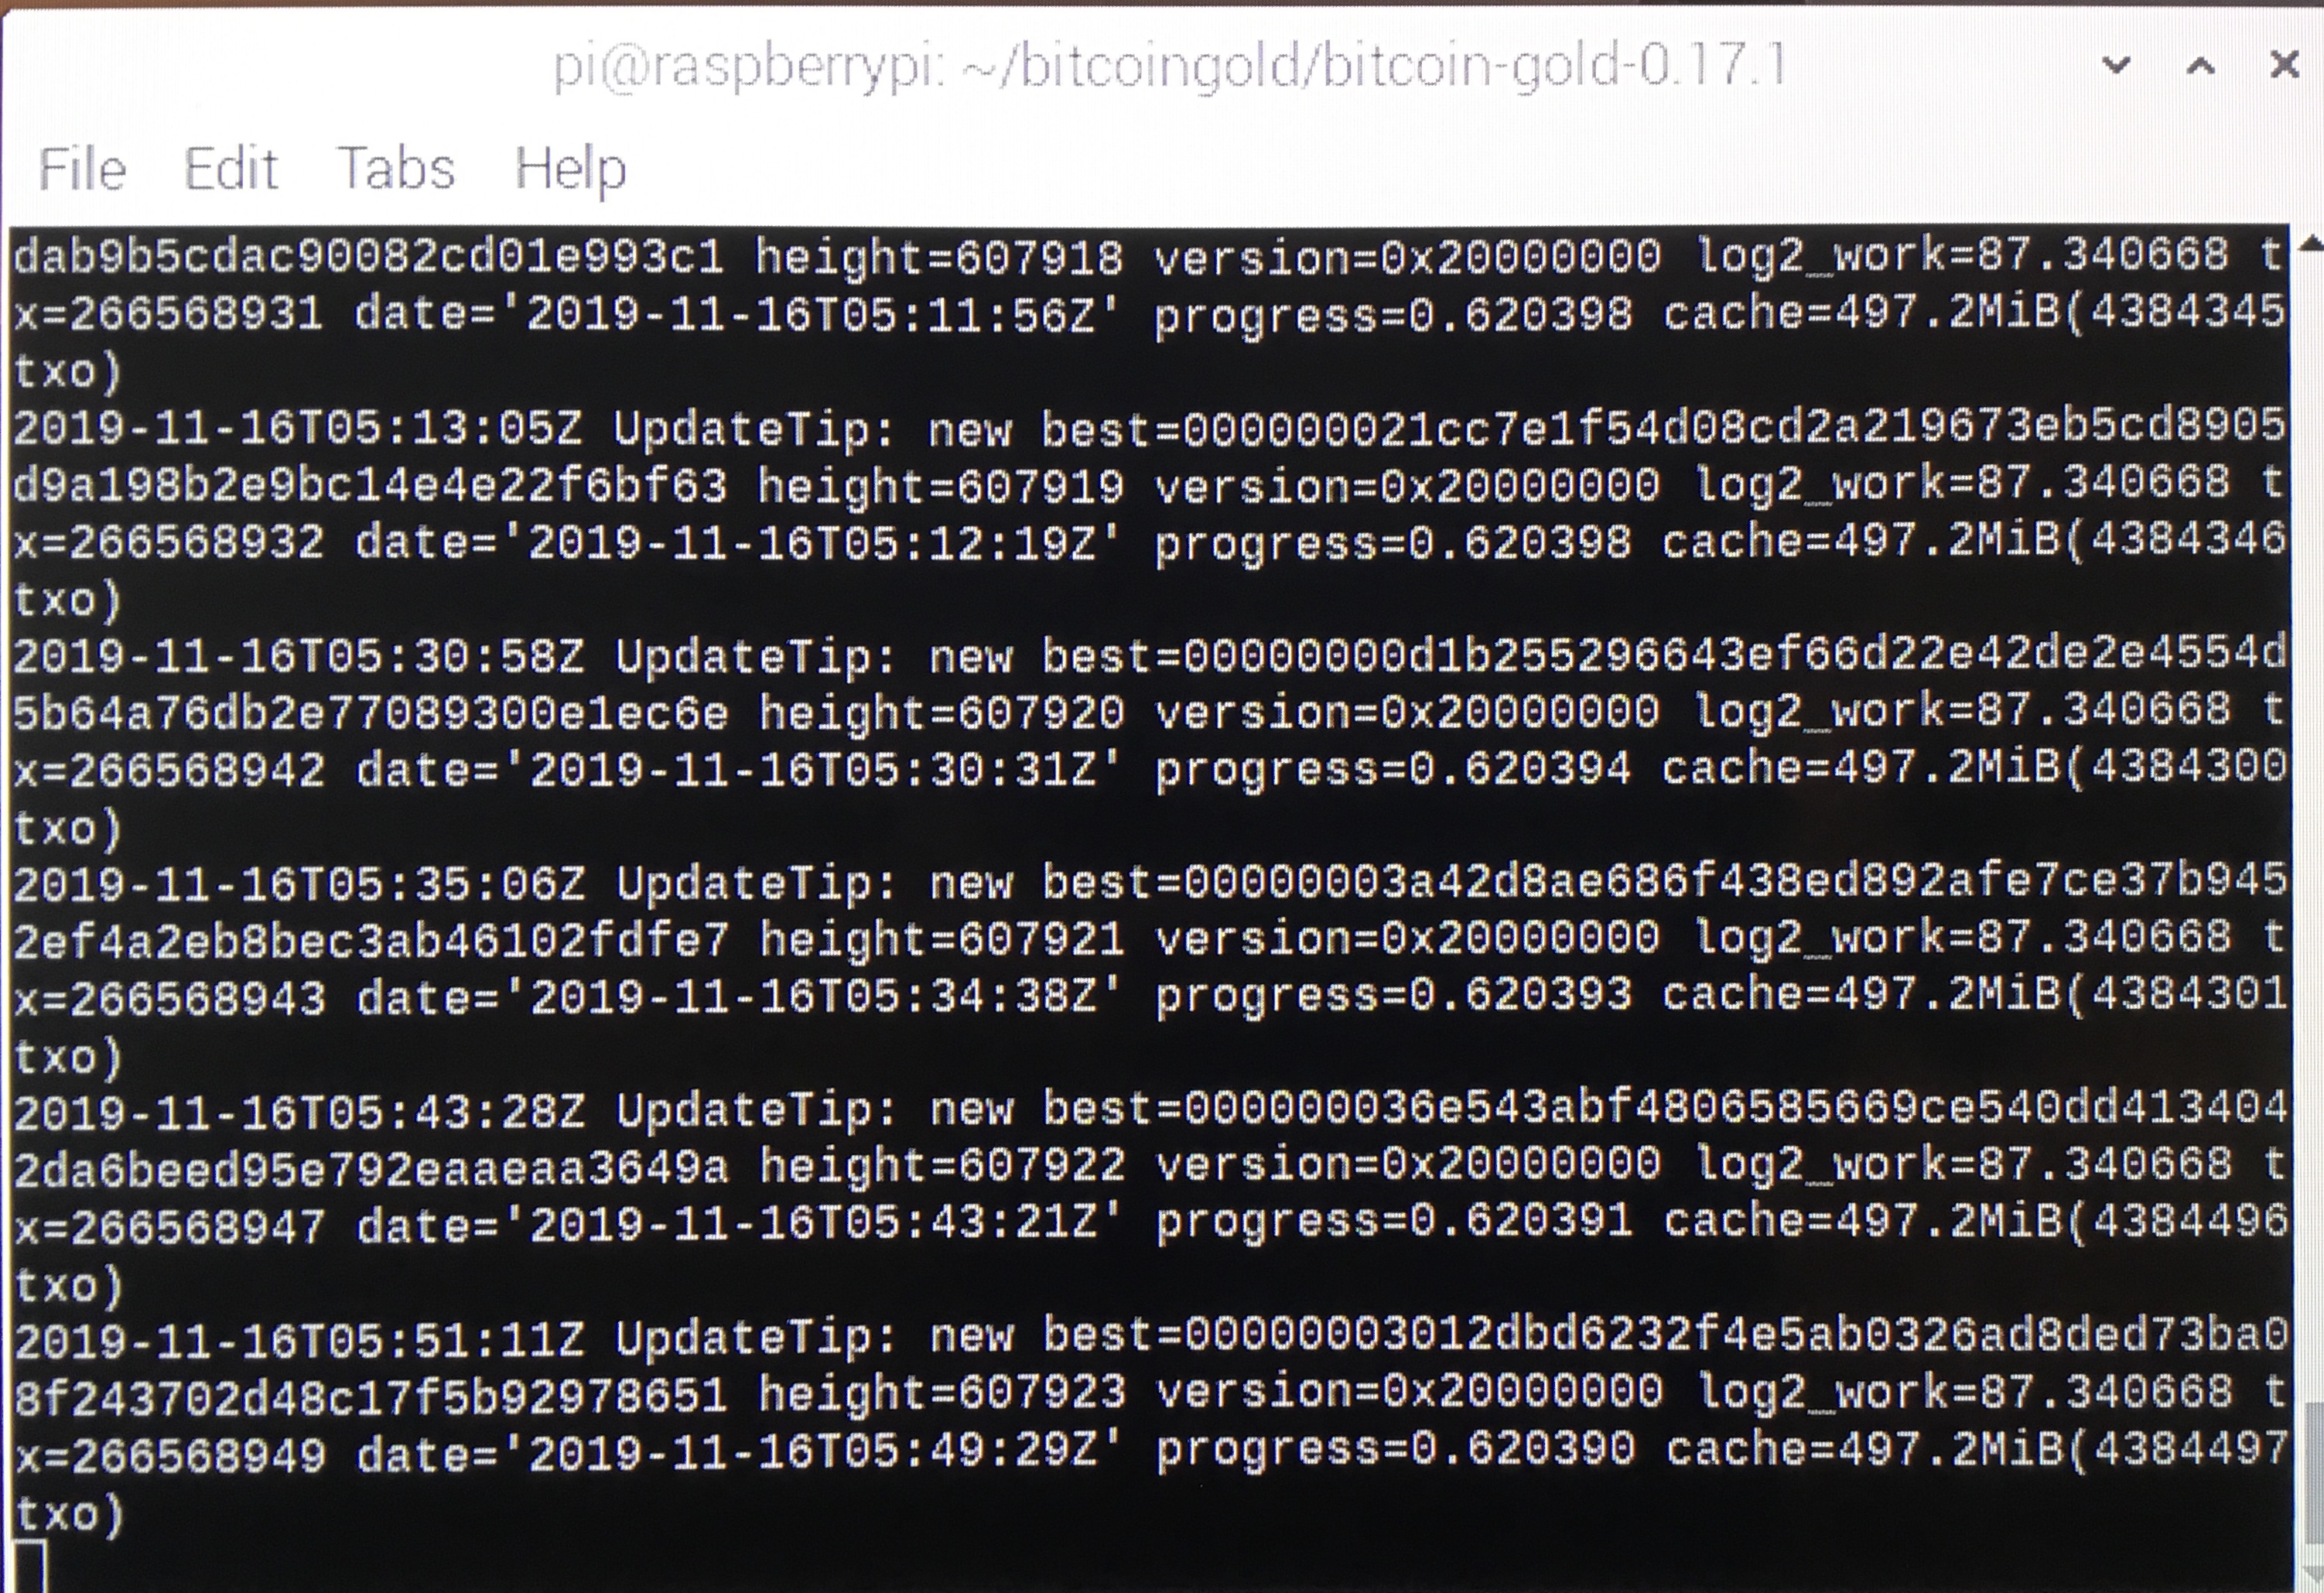
You should now see a screen like this for the terminal; or if you picked the wallet , you will see the wallet.
##NOTE##
What I found useful, was to open the office program and save the below information in there, so when you reboot you just copy and paste in the terminal and it will start right away.
Here is how to get into the office program.
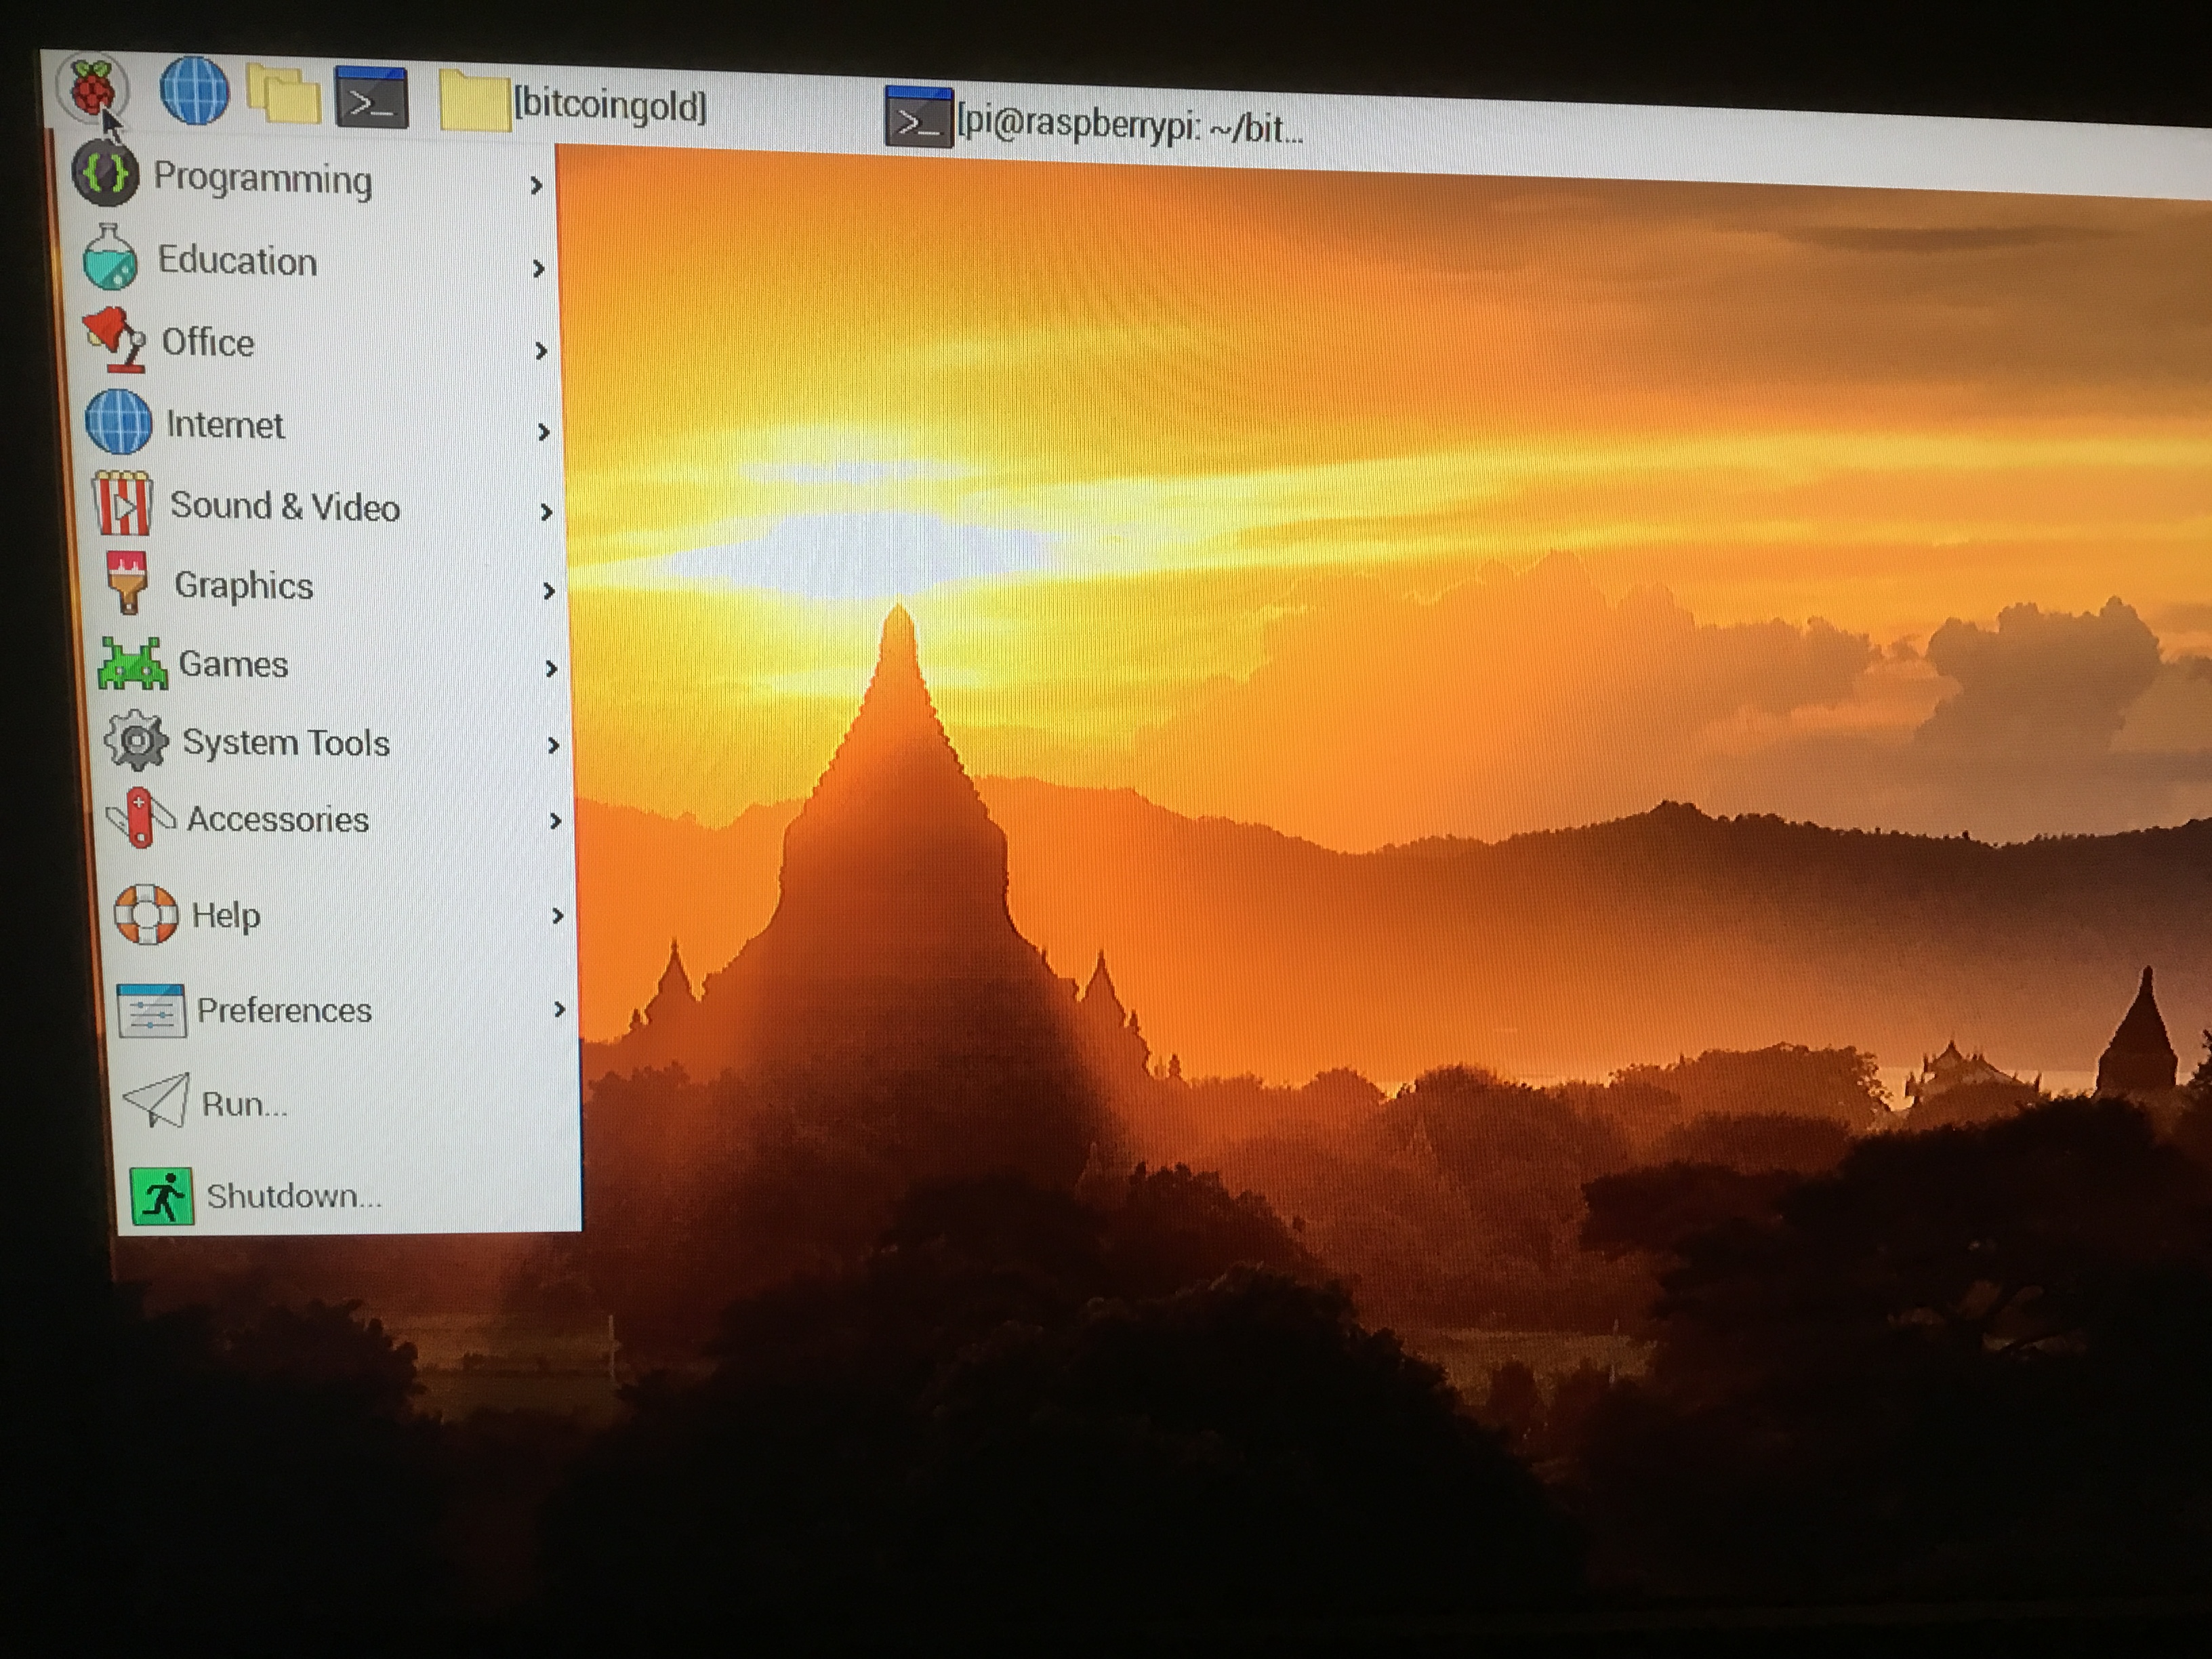
Click the Raspberry to get the drop down
Click office to open sidebar.
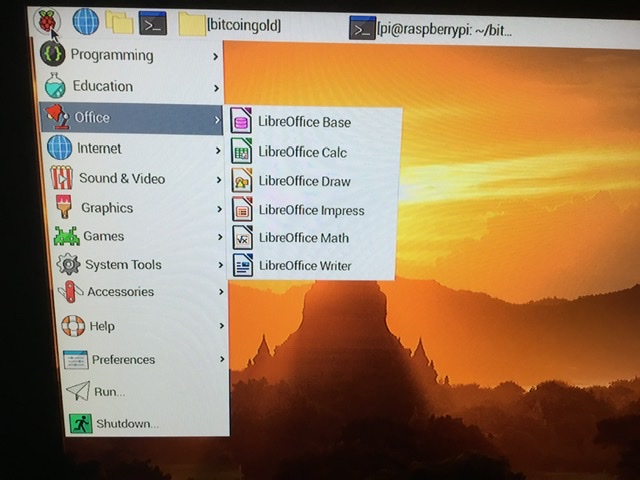
Select LibreOffice Writer and start New
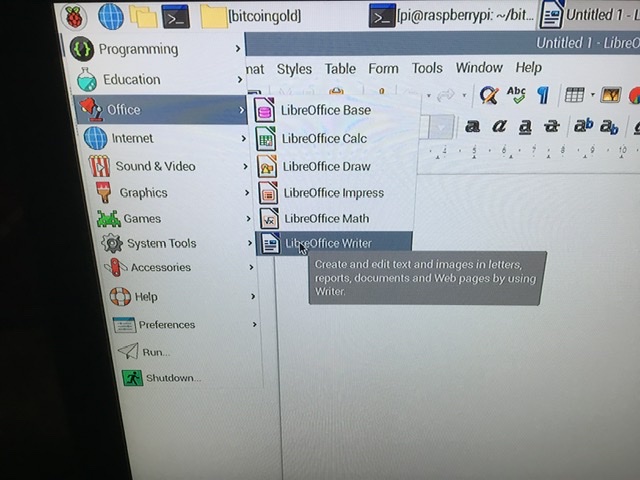
Copy individually and paste into the document.
if [ $(whoami) == ‘root’ ]; then echo “NO don’t run as root”; else cd bin && ./bgoldd; fi
tail -f ~/.bitcoingold/debug.log
Save the file to desktop, whatever name you choose
Open a terminal ind insert your choice .
The first command will start the node and the second will show your progress .
It is a good idea to assign a Static IP
Here is how you can assign a static IP address to your Pi
Open a terminal
( check your current IP address) type: ifconfig
If you are running a wifi look at wlan0
It will say inet addr: ( this is your address)
If you have a wired connection you will look at eth0
Type: clear
Now we have to check the gateway
Type : sudo route -n
This will show your gateway
Example 192.168.0.1
With both of these we can now assign a static IP address
Type: Sudo nano /etc/dhcpcd.conf
This will open a file.
Type: interface (for wifi type) wlan0 ( for wired type) eth0
Type: static ip_address= ( your current IP address)
Every time this Raspberry pi is connected to a router it will always have the same IP. This is important for your node to be connected. Your IP won’t change.
Type: static routers= ( the gateway) 192.168.0.1
Now we have to assign a DNS
Type: Static domain_name_servers=8.8.8.8 8.8.4.4 (hit enter)
Hit: Control x and then press y to change and hit: Enter
Now we need to reboot.
Type: sudo reboot
Once your Pi has rebooted you would like to make sure the changes have been made.
Open a terminal
Type: ifconfig ( hit enter)
Look under either your wlan0 or eth0 to see if your IP shows up correctly
If everything shows up correctly, Congratulations you did it!
Total time to sync the Blockchain:
9 days 8 hours
So just let it be and check on it once in a while. FYI, the screen might
be in sleep mode, so just shake the mouse to wake it up.
Thank you so much! I had a blast making this tutorial and as per usual,
you can find me on discord Here.
Until the next tutorial, Take it easy everyone!
Regards,
Blackbox

